#CASBAN6: Add a Swagger (OpenAPI) page to Azure Functions
Why?
Adding a Swagger page to any API project (not only with Azure Functions) is nowadays one of the most common steps. Implementing the OpenAPI specification makes your API easily testable during development, and in the end, it provides an interactive documentation page to your API consumers.
While these are the major advantages, you can go deeper into that topic on the OpenAPI website. Swagger has become the most popular implementation of the OpenAPI specification and is also available for Azure Functions.
Adding the NuGet
Adding the Swagger UI to our Azure Function needs another NuGet package:
Microsoft.Azure.WebJobs.Extensions.OpenApi
The documentation is only available on GitHub (at the time of writing this post, at least).
Getting started
Now that we have downloaded the NuGet package into our project, we need to configure three or four things in the Program.cs file of our Function app. In the ConfigureServices lambda of the Main method, add these lines:
1
2
3
4
5
6
7
8
9
10
11
12
13
14
15
16
17
18
19
20
21
22
23
24
25
26
27
28
29
30
 services.AddSingleton<IOpenApiConfigurationOptions>(_ =>
{
    OpenApiConfigurationOptions options = new OpenApiConfigurationOptions
    {
        Info = new OpenApiInfo
        {
            Version = "1.23131.0",
            Title = "Serverless Blog API",
            Description = "This is the API on which the serverless blog engine is running.",
            TermsOfService = new Uri("https://yourdomain.com/tos"),
            Contact = new OpenApiContact
            {
                Name = "Your Name goes here",
                Email = "info@yourdomain.com",
                Url = new Uri("https:/yourdomain.com")
            },
            License = new OpenApiLicense
            {
                Name = "License",
                Url = new Uri("https://yourdomain.com/license")
            }
        },
        Servers = DefaultOpenApiConfigurationOptions.GetHostNames(),
        OpenApiVersion = OpenApiVersionType.V3,
        IncludeRequestingHostName = true,
        ForceHttps = false,
        ForceHttp = false
    };
    return options;
});
Let’s walk through that code. We are adding a new OpenApiInfo object filling all the details about contact, licence, etc. Then we configure additional items like the servers and the OpenAPI specifications version. Last, but not least, we are not forcing the Swagger page to use either http or https. This makes testing locally (especially on macOS) easier.
On Azure, the API gets redirected to https, anyway, so this should not be much of a problem. You can change this according to your needs.
If you are now debugging your Function app, you will see new endpoints in the console:
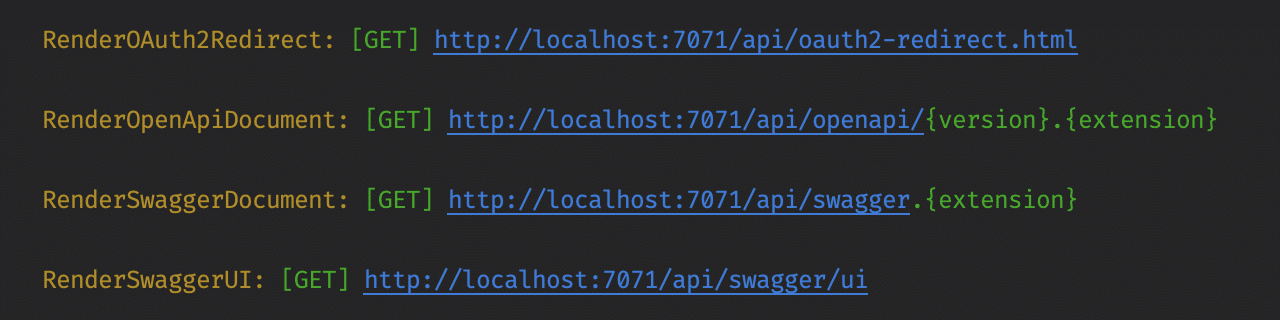 Opening the
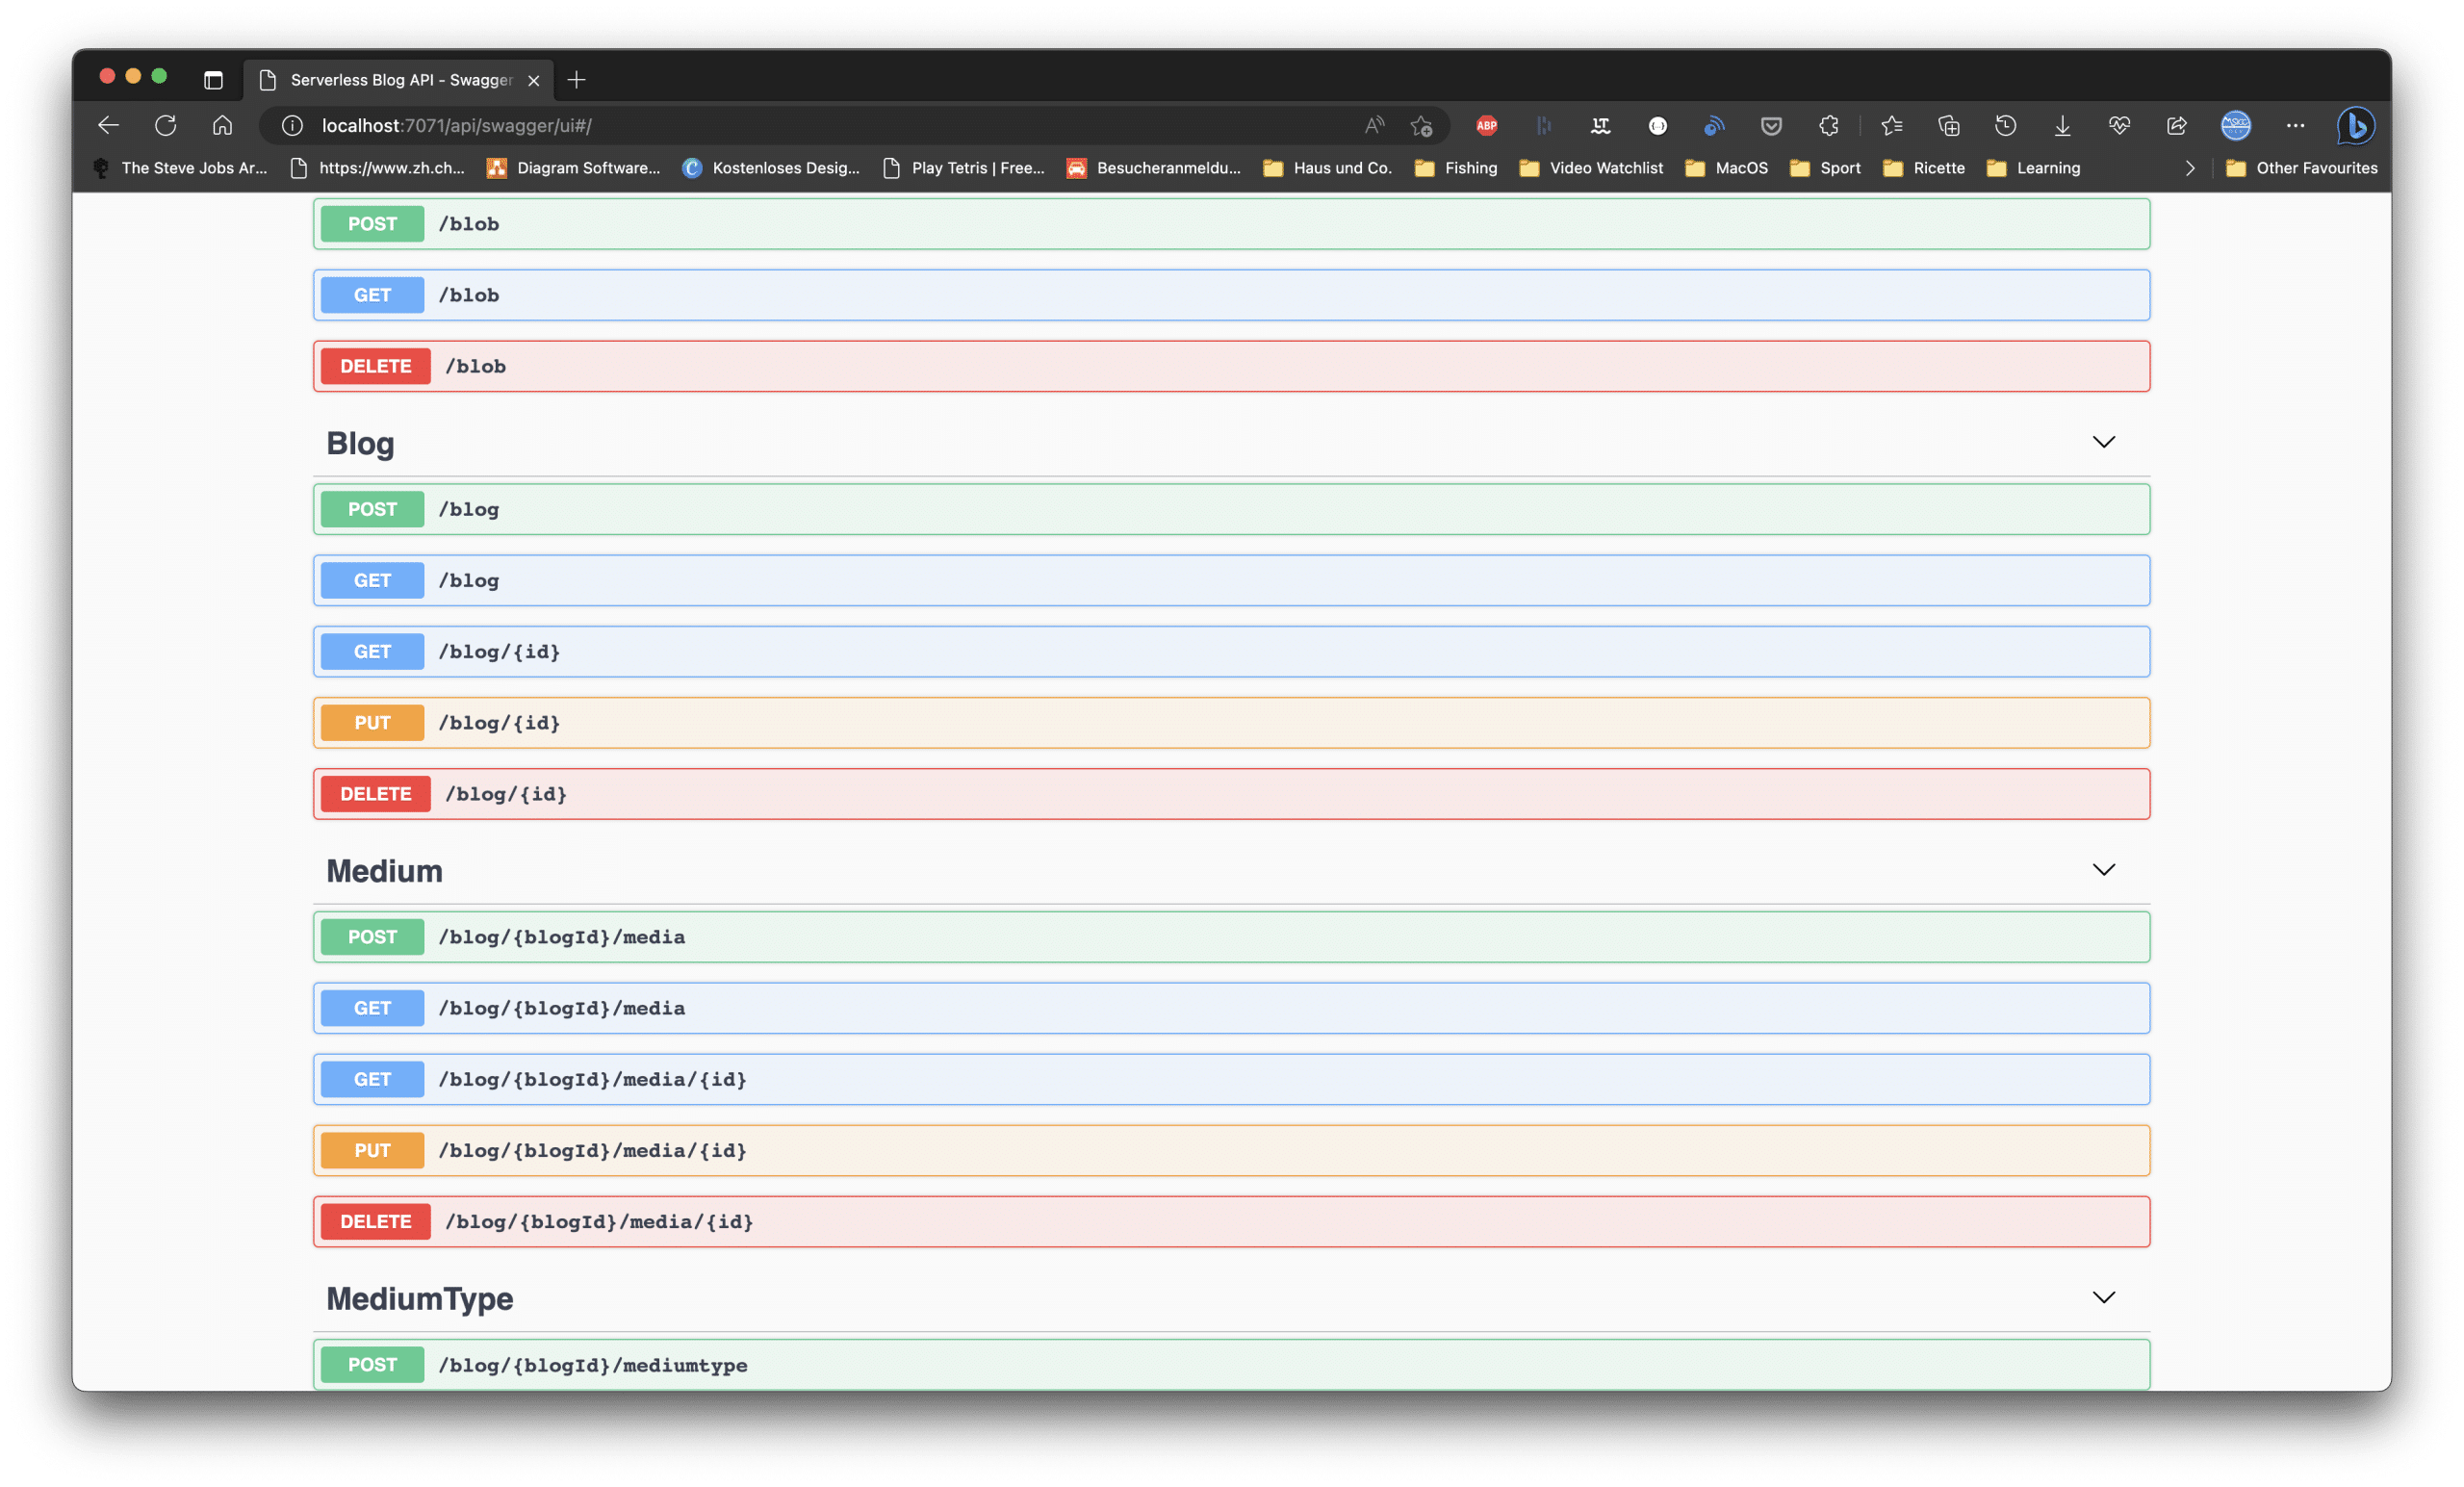
 RenderSwaggerUI URL will lead you to your newly created Swagger page.
Attributing the Function methods
Now that we have our configuration in place, we finally can start to decorate our methods with the OpenAPI attributes. Let’s have a look at the GetList function for posts:
1
2
3
4
5
6
7
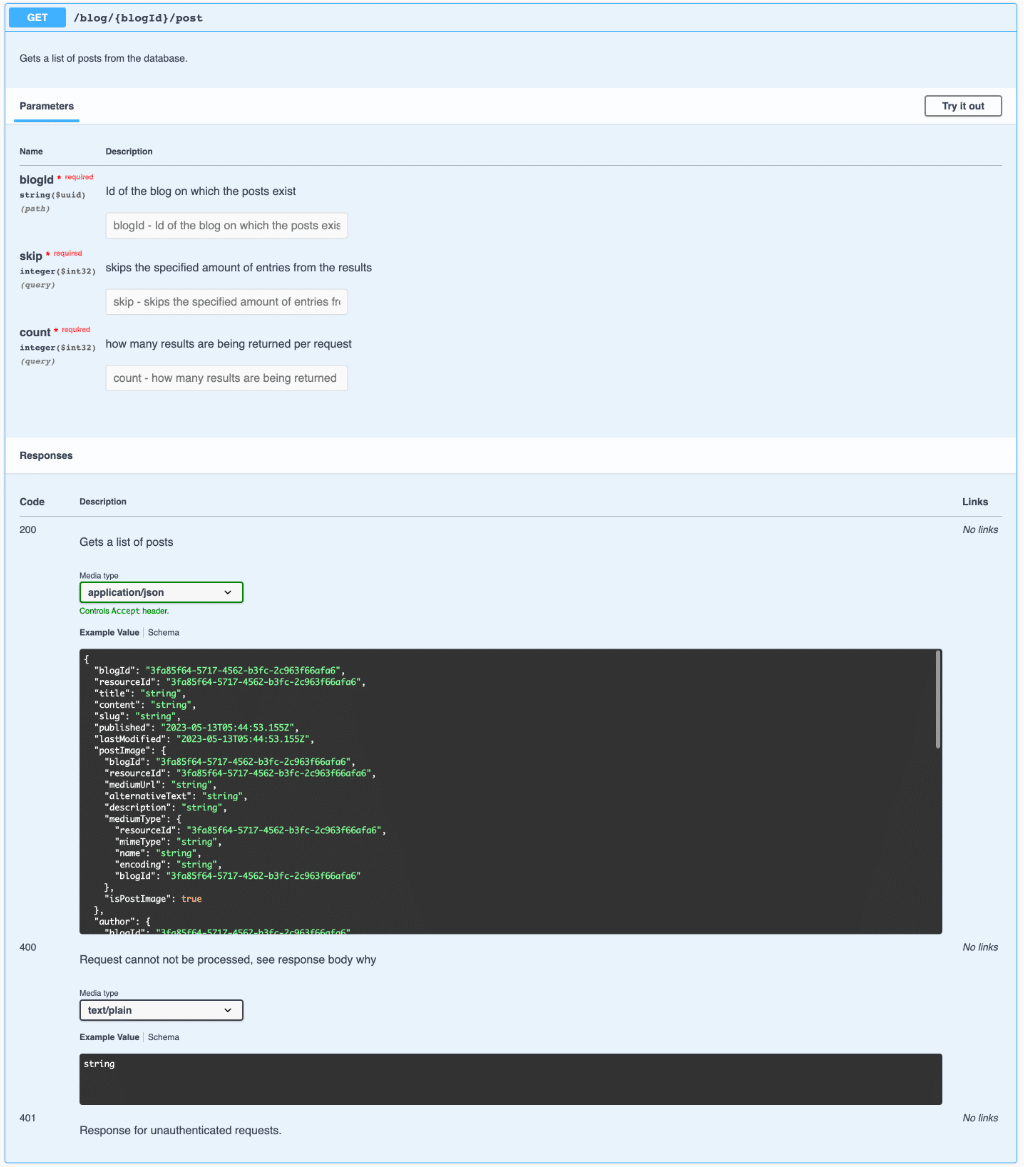
[OpenApiOperation("GET", "Post", Description = "Gets a list of posts from the database.", Visibility = OpenApiVisibilityType.Important)]
[OpenApiParameter("blogId", Type = typeof(Guid), Required = true, Description = "Id of the blog on which the posts exist", Visibility = OpenApiVisibilityType.Important)]
[OpenApiParameter("skip", In = ParameterLocation.Query, Type = typeof(int), Required = true, Description = "skips the specified amount of entries from the results", Visibility = OpenApiVisibilityType.Important)]
[OpenApiParameter("count", In = ParameterLocation.Query, Type = typeof(int), Required = true, Description = "how many results are being returned per request", Visibility = OpenApiVisibilityType.Important)]
[OpenApiResponseWithBody(HttpStatusCode.OK, "application/json", typeof(Post), Description = "Gets a list of posts")]
[OpenApiResponseWithoutBody(HttpStatusCode.Unauthorized, Description = "Response for unauthenticated requests.")]
[OpenApiResponseWithBody(HttpStatusCode.BadRequest, "text/plain", typeof(string), Description = "Request cannot not be processed, see response body why")]
Let’s go through the attributes. To add the endpoint to the Swagger page, add the OpenApiOperation attribute and specify the http method, a tag as well as the description. By setting the visibility to important, we make sure the field gets always shown. The tag is used to group endpoints on the Swagger page.
Depending on your endpoint, you may have parameters. You can add them by using the OpenApiParameter attribute. The In parameter specifies the usage location (path, query, header or cookie). In this project, I used only the default value (path) and the query location.
At the end, we are also describing the output of our function by using the OpenApiResponseWithBody and OpenApiResponseWithoutBody attributes. Specify the status code, the content type and its corresponding object as well as a description.
This is the result of the attribution shown above:
Conclusion
By investing some time into attributing all your functions, you will have a fully blown API documentation ready for yourself and your API consumers. I recommend studying the samples found in the GitHub repo, which helped me a lot to understand all the attributes and how to implement the Swagger page. As always, I hope this post will be helpful for some of you.
In the next post, I will show you how to use an Azure Function as a facade for uploading, deleting and retrieving files from Azure Blob storage.