How to modify the border of a .NET MAUI Entry on iOS and MacCatalyst

In my recent side project, TwistReader, I needed to modify the Border of an Entry to match my application’s primary color. The .NET MAUI Entry does not provide a direct way to change the color of the border, however. Luckily, it isn’t that difficult to change the color of the border, nonetheless.
Modifying the mapping of the native control
The .NET MAUI Entry renders to a native UITextField. The logical consequence is that I need to use the Mapper of the Entry control to modify the Border of the underlying native control. This is pretty easy:
1
2
3
4
5
6
7
8
9
10
11
12
13
14
15
16
17
18
19
20
21
22
 internal void ModifyUiTextField()
{
    Microsoft.Maui.Handlers.EntryHandler.Mapper.AppendToMapping(nameof(ModifyUiTextField), (handler, view) =>
    {
        handler.PlatformView.BorderStyle = UITextBorderStyle.None;

        handler.PlatformView.Layer.BorderColor = UIColor.SystemGray3.CGColor;
        handler.PlatformView.Layer.BorderWidth = 2.0f;
        handler.PlatformView.Layer.MasksToBounds = true;
        handler.PlatformView.Layer.CornerRadius = 8.0f;

        handler.PlatformView.EditingDidBegin += (sender, args) =>
        {
            handler.PlatformView.Layer.BorderColor = ((Color)App.Current.Resources["Primary"]).ToCGColor();
        };

        handler.PlatformView.EditingDidEnd += (sender, args) =>
        {
            handler.PlatformView.Layer.BorderColor = UIColor.SystemGray3.CGColor;
        };
    });
}
Let’s break that down. I call the ModifyUiTextField() method in the constructor of the containing page (as this is the only occurrence of an Entry so far). We could also add this in App.xaml.cs, which would modify all Entry instances throughout the app.
First, we need to deactivate the built-in Border by setting the UITextField.BorderStyle property to UITextBorderStyle.None;
The next step is to use to change the Border related properties of the UITextField‘s <a href="https://developer.apple.com/documentation/quartzcore/calayer?language=objc">CALayer</a>. The default color is SystemGray3, so if we do not have focus (aka not being the first responder) on the control, this will be the default. Setting MasksToBounds to true makes sure everything rests within the control. Finally, I added some nice rounded corners to the Border by setting the CornerRadius.
By handling the native control’s EditingDidBegin and EditingDidEnd events, we are able to switch between the default color and our application’s primary (or whatever) color. This will look like this:
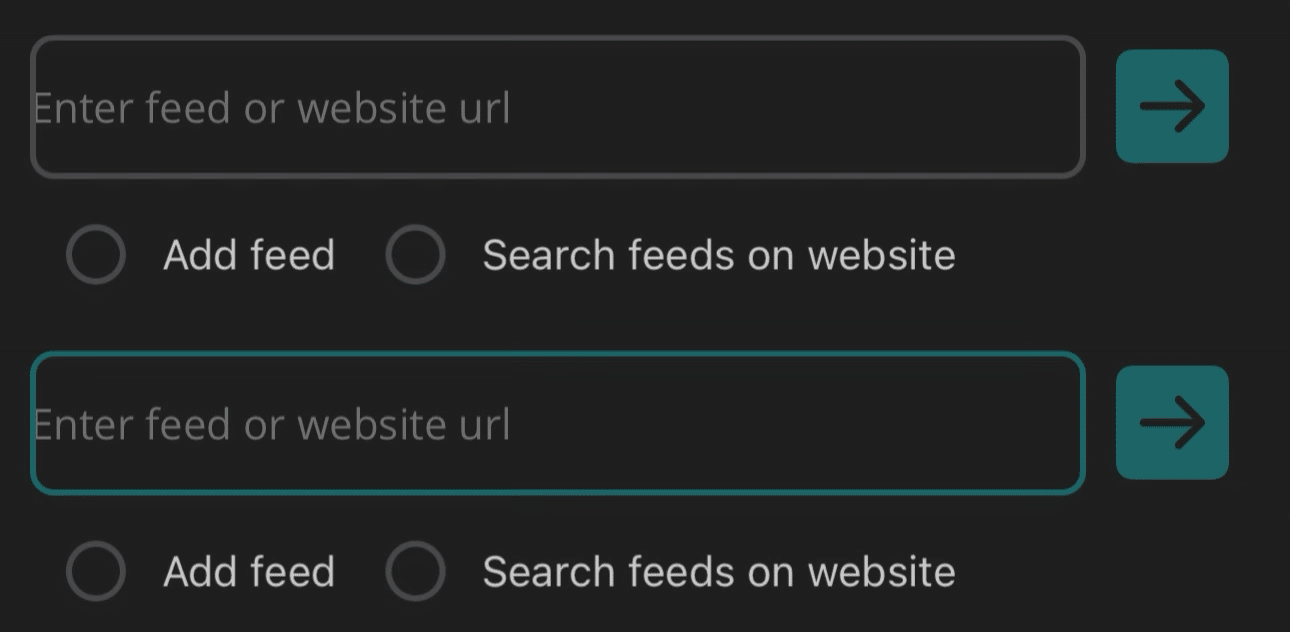 As you can see, the coloring part is now working as intended. But the text (both placeholder and input text), is not aligned well within the control.
Fixing text alignment
The text alignment of the UITextField is also a common problem for native iOS programming for years. Because of this, there are tons of posts on StackOverflow and the rest of the web explaining how to fix this. Almost all of them point to a simple solution – adding a padding view to move the text into place. This is my implementation of it:
1
2
3
4
5
 var paddingView = new UIView(new CGRect(0, 0, 10, handler.PlatformView.Frame.Height));
handler.PlatformView.LeftView = paddingView;
handler.PlatformView.LeftViewMode = UITextFieldViewMode.Always;
handler.PlatformView.RightView = paddingView;
handler.PlatformView.RightViewMode = UITextFieldViewMode.Always;
Inserting this code after setting the Border properties will add a nice margin to both sides of the Entry and makes the control finally look like we wanted:

Conclusion
Even with .NET MAUI, we sometimes need to touch the underlying native implementation to modify the controls to our needs. The handler architecture of .NET MAUI makes this pretty easy. With a bit of a good search-foo, we can easily find the native solutions and adapt them in our apps. If you want to make the code above reusable, just create your own custom version of an Entry as described in the docs.
As always, I hope this post will be helpful for some of you.