Xamarin Forms, the MVVMLight Toolkit and I (new series) [Updated]
Updated some code parts that needed to be changed in the ViewModelLocator.
Please see also this post for upgrading the project to .netStandard:
Like some of you may have already registered, I have been doing the next step and went cross platform with my personal projects. I am primarily using Xamarin Forms, because I eventually like XAML a little too much. I took a break from round about 2 years on my Xamarin usage, and I am happy to see that it has improved a lot in the meantime. While Xamarin Forms still has room for improvementes, one can do already real and serious projects with it. As I like the lightweight MVVMLight toolkit as much as I like XAML, it was a no-brainer for me to start also my recent Xamarin projects with it.
There is quite some setup stuff to do if you want get everything working from the Xamarin Forms PCL, and this post will be the first in a series to explain the way I am currently using. Some of the things I do may be against good practice for Xamarin Forms, but sometimes one has to break out of them to write code more efficiently and also maintain it easier.
Installing MVVM Light into a Xamarin Forms PCL project
Of course, we will start with a new Xamarin Forms project. After selecting the type Cross Platform App in the New Project Dialog in Visual Studio, you’ll be presented with this screen, which was introduced in the Cycle 9 Release of Xamarin:
Select Xamarin Forms as UI Technology and PCL as Code Sharing Strategy to start the solution creation. As it creates several projects, this may take some time, so you may be able to refill your coffee cup in the meantime. Once the project is created, you’ll see 4 projects:
Before we are going to write some code, we will update and add the additional packages from within the NuGet Package Manager. If your are not targeting the Android versions 7.x , Xamarin Forms is not able to use the latest Android Support libraries, so you’ll have to stick with version 23.3.0 of them (see release notes of Xamarin Forms). Since it makes sense for a new app to target the newest Android version, we’ll be updating the Android Support packages for our sample app as well.
If the NuGet Package manager demands you to restart, you’ll better follow its advise. To verify everything is ok with the updated NuGet packages, set the Android project as Startup project and let Visual Studio compile it.
If all goes well, let’s make sure we are using the right UWP compiler version for Visual Studio 2015. The .NETCORE package for the UWP needs to be of Version 5.2.x, as 5.3 is only compatible with Visual Studio 2017.
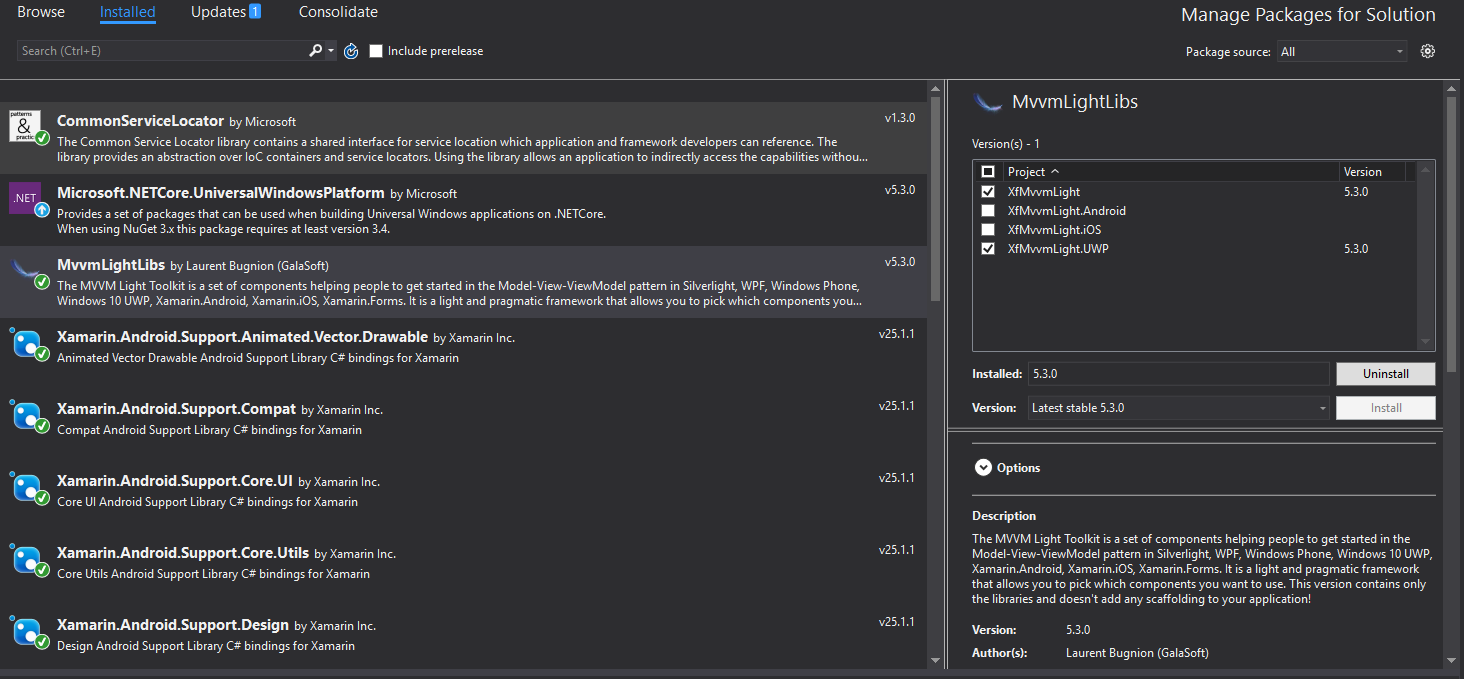
Once the packages are up to date, we’ll finally download and install MVVMLight. As we will host all of our ViewModel Logic in Xamarin Forms, together with their Views, we just need to install it into the Portable library and into the UWP project:
There will be no changes to the project except adding the reference. We need to set up the structure ourselves. First, create two new folders, View and ViewModel:
Move the MainPage into the View Folder and adjust the Namespace accordingly. The next step is to setup a ViewModelLocator class, which takes a central part of our MVVM structure. Here is what you need for the base structure:
1
2
3
4
5
6
7
8
9
10
11
12
13
14
15
16
17
18
19
20
21
22
23
     public class ViewModelLocator
    {
        private static ViewModelLocator _instance;
        public static ViewModelLocator Instance => _instance ?? (_instance = new ViewModelLocator());

        public void Initialize()
        {
            ServiceLocator.SetLocatorProvider(() => SimpleIoc.Default);
            RegisterServices();

        }

        private static void RegisterServices()
        {
            //topic of another blog post
        }

        #region ViewModels
        #endregion

        #region PageKeys
        #endregion
    }
You may notice some things. First, I am using the singleton pattern for the ViewModelLocator to make sure I have just one instance. I had some problems with multiple instances on Android, and using a singleton class helped to fix them. The second part of the fix is to move everything that is normally in the constructor into the Initialize() method. Now let’s go ahead, add a MainViewModel to the project and to the ViewModelLocator:
1
2
3
4
5
6
7
8
9
10
11
         public void Initialize()
        {
            ServiceLocator.SetLocatorProvider(() => SimpleIoc.Default);
            RegisterServices();
            if (!SimpleIoc.Default.IsRegistered)
                SimpleIoc.Default.Register<MainViewModel>();
        }

        #region ViewModels
        public MainViewModel MainVm => ServiceLocator.Current.GetInstance<MainViewModel>();
        #endregion
Let’s give the MainViewModel just one property which is not subject to change (at least for now):
1
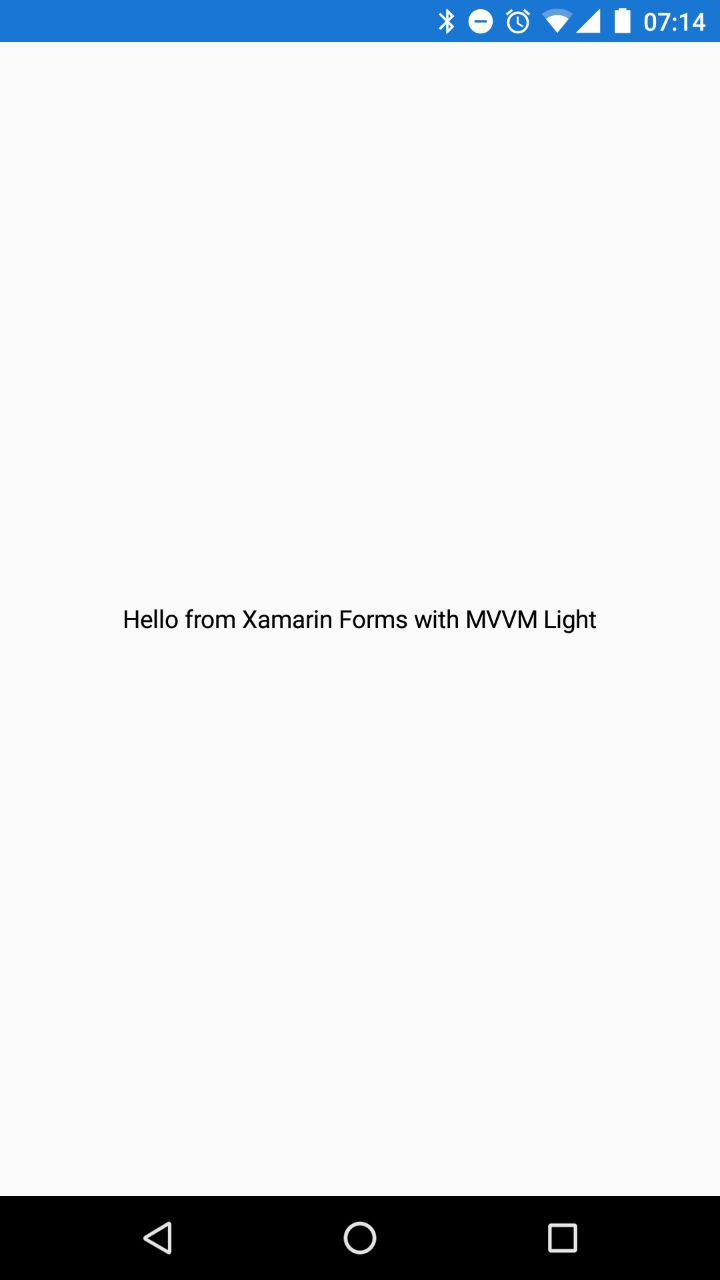
 public string HelloWorldString { get; private set; } = "Hello from Xamarin Forms with MVVM Light";
The next step is to get the App.xaml file code right, it should look like this:
1
2
3
4
5
6
7
8
9
10
11
12
13
14
15
16
 <?xml version="1.0" encoding="utf-8"?>
<Application xmlns="https://xamarin.com/schemas/2014/forms"
             xmlns:x="https://schemas.microsoft.com/winfx/2009/xaml"
             x:Class="XfMvvmLight.App"
             xmlns:d="https://schemas.microsoft.com/expression/blend/2008"
             d1p1:Ignorable="d"
             xmlns:d1p1="https://schemas.openxmlformats.org/markup-compatibility/2006"
             xmlns:forms="https://xamarin.com/schemas/2014/forms"
             xmlns:vm="clr-namespace:XfMvvmLight.ViewModel" >
  <Application.Resources>
    <!-- Application resource dictionary -->
    <forms:ResourceDictionary xmlns="https://schemas.microsoft.com/winfx/2006/xaml/presentation">
      <vm:ViewModelLocator x:Key="Locator" d:IsDataSource="True" />
    </forms:ResourceDictionary>
  </Application.Resources>
</Application>
Now that we have set up the baisc MVVM structure, we are going to connect our MainViewModel to our MainPage. There are two ways to do so.
In Xaml:
1
2
3
 <ContentPage.BindingContext>
    <Binding Path="MainVm" Source="{StaticResource Locator}" />
</ContentPage.BindingContext>
in Code:
1
2
3
4
5
6
         public MainPage()
        {
            InitializeComponent();

            this.BindingContext = ViewModelLocator.Instance.MainVm;
        }
After that, just use the HelloWorldString property of the MainViewModel as Text in the already existing Label:
1
2
3
     <Label Text="{Binding HelloWorldString}"
           VerticalOptions="Center"
           HorizontalOptions="Center" />
Before we are able to test our code, we need to make sure our ViewModelLocator is initialized properly:
Android:
1
2
3
4
5
6
7
8
9
10
11
12
13
14
15
16
     public class MainActivity : global::Xamarin.Forms.Platform.Android.FormsAppCompatActivity
    {
        protected override void OnCreate(Bundle bundle)
        {
            //TabLayoutResource = Resource.Layout.Tabbar;
            //ToolbarResource = Resource.Layout.Toolbar;

            base.OnCreate(bundle);

            global::Xamarin.Forms.Forms.Init(this, bundle);

            ViewModelLocator.Instance.Initialize();

            LoadApplication(new App());
        }
    }
iOS:
1
2
3
4
5
6
7
8
9
10
11
12
13
14
15
16
17
18
19
20
21
     [Register("AppDelegate")]
    public partial class AppDelegate : global::Xamarin.Forms.Platform.iOS.FormsApplicationDelegate
    {
        //
        // This method is invoked when the application has loaded and is ready to run. In this
        // method you should instantiate the window, load the UI into it and then make the window
        // visible.
        //
        // You have 17 seconds to return from this method, or iOS will terminate your application.
        //
        public override bool FinishedLaunching(UIApplication app, NSDictionary options)
        {
            global::Xamarin.Forms.Forms.Init();

            ViewModelLocator.Instance.Initialize();

            LoadApplication(new App());

            return base.FinishedLaunching(app, options);
        }
    }
UWP:
1
2
3
4
5
6
7
8
9
10
11
12
13
14
15
16
17
18
19
20
21
22
23
24
25
26
27
28
29
30
31
32
33
34
35
36
37
38
39
40
41
42
43
44
45
 //in App.xaml.cs:
        protected override void OnLaunched(LaunchActivatedEventArgs e)
        {

#if DEBUG
            if (System.Diagnostics.Debugger.IsAttached)
            {
                this.DebugSettings.EnableFrameRateCounter = true;
            }
#endif

            Frame rootFrame = Window.Current.Content as Frame;

            // Do not repeat app initialization when the Window already has content,
            // just ensure that the window is active
            if (rootFrame == null)
            {
                // Create a Frame to act as the navigation context and navigate to the first page
                rootFrame = new Frame();

                rootFrame.NavigationFailed += OnNavigationFailed;

                Xamarin.Forms.Forms.Init(e);

                ViewModelLocator.Instance.Initialize();

                if (e.PreviousExecutionState == ApplicationExecutionState.Terminated)
                {
                    //TODO: Load state from previously suspended application
                }

                // Place the frame in the current Window
                Window.Current.Content = rootFrame;
            }

            if (rootFrame.Content == null)
            {
                // When the navigation stack isn't restored navigate to the first page,
                // configuring the new page by passing required information as a navigation
                // parameter
                rootFrame.Navigate(typeof(MainPage), e.Arguments);
            }
            // Ensure the current window is active
            Window.Current.Activate();
        }
Let’s test our app on all platforms by building and deploying them:
iOS Screenshot – post will be updated
If you get the same screens, you are all set up to use Xamarin Forms with MVVMLight.
Conclusion
I know there are several specialized MVVM frameworks/toolkits floating around, which are commonly used for Xamarin Forms. As I am quite used to the MVVMLight toolkit, I prefer it over them. It is a lightweight solution, and I have more control over the code that is running than with the other options. I know I have to handle a lot of things in this case on my own (Navigation for example), but these will get their own blog posts. Starting with one of the future posts in this series, I will provide a sample app on my Github account.
If you have feedback or questions, feel free to get in contact with me via comments or on my social accounts. Otherwise, I hope this post and the following ones are helpful for some of you.
Happy coding, everyone!


