Sending push notifications to your Xamarin app from WordPress with Azure, Part II – the Function
First, let’s have a look at the lineup of this series once again:
- Preparing your WordPress (blog/site)
- Preparing the Azure Function and connect the Webhook (this post)
- Preparing the Notification Hub
- Send the notification to Android
- Send the notification to iOS
- Adding in Xamarin.Forms
Creating a new Azure Function in Visual Studio
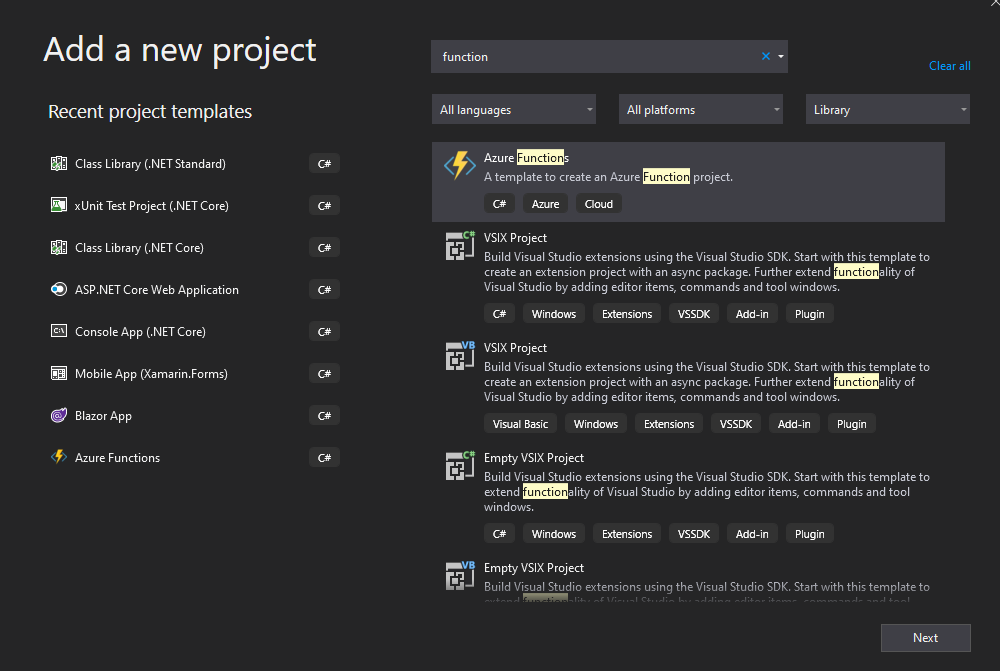
The most simple approach to create a new Azure Function (if you already have an Azure account) is adding a new project to your Xamarin solution:
 After the project is loaded, double click on the
 .csproj file in the Solution Explorer to open the file for editing it. Make sure you have the following two PropertyGroup entries:
1
2
3
4
5
6
7
8
9
10
11
   <PropertyGroup>
    <TargetFramework>net461</TargetFramework>
    <AzureFunctionsVersion>v1</AzureFunctionsVersion>
  </PropertyGroup>
  <ItemGroup>
    <!--DO NOT UPDATE THE AZURE PACKAGES, IT WILL BREAK EVERYTHING!!!!-->
    <PackageReference Include="Microsoft.Azure.NotificationHubs" Version="1.0.9" />
    <PackageReference Include="Microsoft.Azure.WebJobs.Extensions.NotificationHubs" Version="1.3.0" />
    <PackageReference Include="Microsoft.NET.Sdk.Functions" Version="1.0.31" />
    <PackageReference Include="Newtonsoft.Json" Version="9.0.1" />
  </ItemGroup>
You may notice that I made an all caps comment into the second PropertyGroup entry. As I am using a v1 Function, these are the latest packages that I am able to use. They are doing their job, and allow us to use an easy way to bind the Function to the Azure NotificationHub , which we are going to implement in the next post. I delayed updating the whole setup to use a v2 function intentionally at this point.
Processing the Webhook payload
In order to be able to process the payload (remember, we are getting a JSON string) from our WordPress Webhook, we need to deserialize it. Let’s create the class that holds all information about it:
1
2
3
4
5
6
7
8
9
10
11
12
13
14
15
16
17
18
19
20
 using Newtonsoft.Json;

namespace NewPostHandler
{
    public class PublishedPostNotification
    {
        [JsonProperty("id")]
        [JsonConverter(typeof(StringToLongConverter))]
        public long Id { get; set; }

        [JsonProperty("title")]
        public string Title { get; set; }

        [JsonProperty("status")]
        public string Status { get; set; }

        [JsonProperty("featured_media")]
        public string FeaturedMedia { get; set; }
    }
}
The class gets it pretty straight forward, we will use this implementation as-is for the payload we are sending to Android later on. The use of the StringToLongConverter is optional. For completeness, here is the implementation:
1
2
3
4
5
6
7
8
9
10
11
12
13
14
15
16
17
18
19
20
21
22
23
24
25
26
27
28
29
30
31
32
33
34
35
36
 using Newtonsoft.Json;
using System;

namespace NewPostHandler
{
    public class StringToLongConverter : JsonConverter
    {
        public override bool CanConvert(Type t) => t == typeof(long) || t == typeof(long?);

        public override object ReadJson(JsonReader reader, Type t, object existingValue, JsonSerializer serializer)
        {
            if (reader.TokenType == JsonToken.Null) return default(long);
            var value = serializer.Deserialize<string>(reader);
            if (long.TryParse(value, out var l))
            {
                return l;
            }

            return default(long);
        }

        public override void WriteJson(JsonWriter writer, object untypedValue, JsonSerializer serializer)
        {
            if (untypedValue == null)
            {
                serializer.Serialize(writer, null);
                return;
            }
            var value = (long)untypedValue;
            serializer.Serialize(writer, value.ToString());
            return;
        }

        public static readonly StringToLongConverter Instance = new StringToLongConverter();
    }
}
Now that we prepared our data transferring object, it is time to finally have a look at the processor code.
1
2
3
4
5
6
7
8
9
10
11
12
13
14
15
16
17
18
19
20
21
22
23
24
25
26
27
28
29
30
31
32
33
34
35
36
37
38
39
40
41
42
43
44
45
46
47
48
49
50
51
52
53
54
55
56
57
58
59
60
61
62
 [FunctionName("HandleNewPostHook")]
public static async Task<HttpResponseMessage> Run([HttpTrigger(AuthorizationLevel.Function, "post", Route = null)]HttpRequestMessage req, TraceWriter log)
{
    _log = log;
    _log.Info("arrived at 'HandleNewPostHook' function trigger.");

    //ignoring any query parameters, only using POST body

    PublishedPostNotification result = null;

    try
    {
        _jsonSerializerSettings = new JsonSerializerSettings()
        {
            MetadataPropertyHandling = MetadataPropertyHandling.Ignore,
            DateParseHandling = DateParseHandling.None,
            Converters =
            {
                new IsoDateTimeConverter { DateTimeStyles = DateTimeStyles.AssumeUniversal },
                StringToLongConverter.Instance
            }
        };

        _jsonSerializer = JsonSerializer.Create(_jsonSerializerSettings);

        using (var stream = await req.Content.ReadAsStreamAsync())
        {
            using (var reader = new StreamReader(stream))
            {
                using (var jsonReader = new JsonTextReader(reader))
                {
                    result = _jsonSerializer.Deserialize<PublishedPostNotification>(jsonReader);
                }
            }
        }

        if (result == null)
        {
            _log.Error("There was an error processing the request (serialization result is NULL)");
            return req.CreateResponse(HttpStatusCode.BadRequest, "There was an error processing the post body");
        }

       //subject of the next post
      //await TriggerPushNotificationAsync(result);
    }
    catch (Exception ex)
    {
        _log.Error("There was an error processing the request", ex);
        return req.CreateResponse(HttpStatusCode.BadRequest, "There was an error processing the post body");
    }

    if (result.Id != default)
    {
        _log.Info($"initiated processing of published post with id {result.Id}");
        return req.CreateResponse(HttpStatusCode.OK, "Processing new published post...");
    }
    else
    {
        _log.Error("There was an error processing the request (cannot process result Id with default value)");
        return req.CreateResponse(HttpStatusCode.BadRequest, "There was an error processing (postId not valid)");
    }
}
Let’s go through the code. The first thing I want to know is if we ever enter the Function, so I log the entrance. The second step is setting up the JsonSerializer to deserialize the payload into the DTO class I created before.
There are several scenarios that I am handling and returning different responses. Ideally, we would run through and arrive at the TriggerPushNotificationAsync call, followed by a jump the ‘OK‘- response if the post id received from our Webhook is valid. During testing, however, I ran into other situations as well, where I return a ‘Bad Request‘ response with a hint that something went wrong.
The implementation of the TriggerPushNotificationAsync method is not shown in this post as it will be subject of the next post in this series.
Testing the code locally
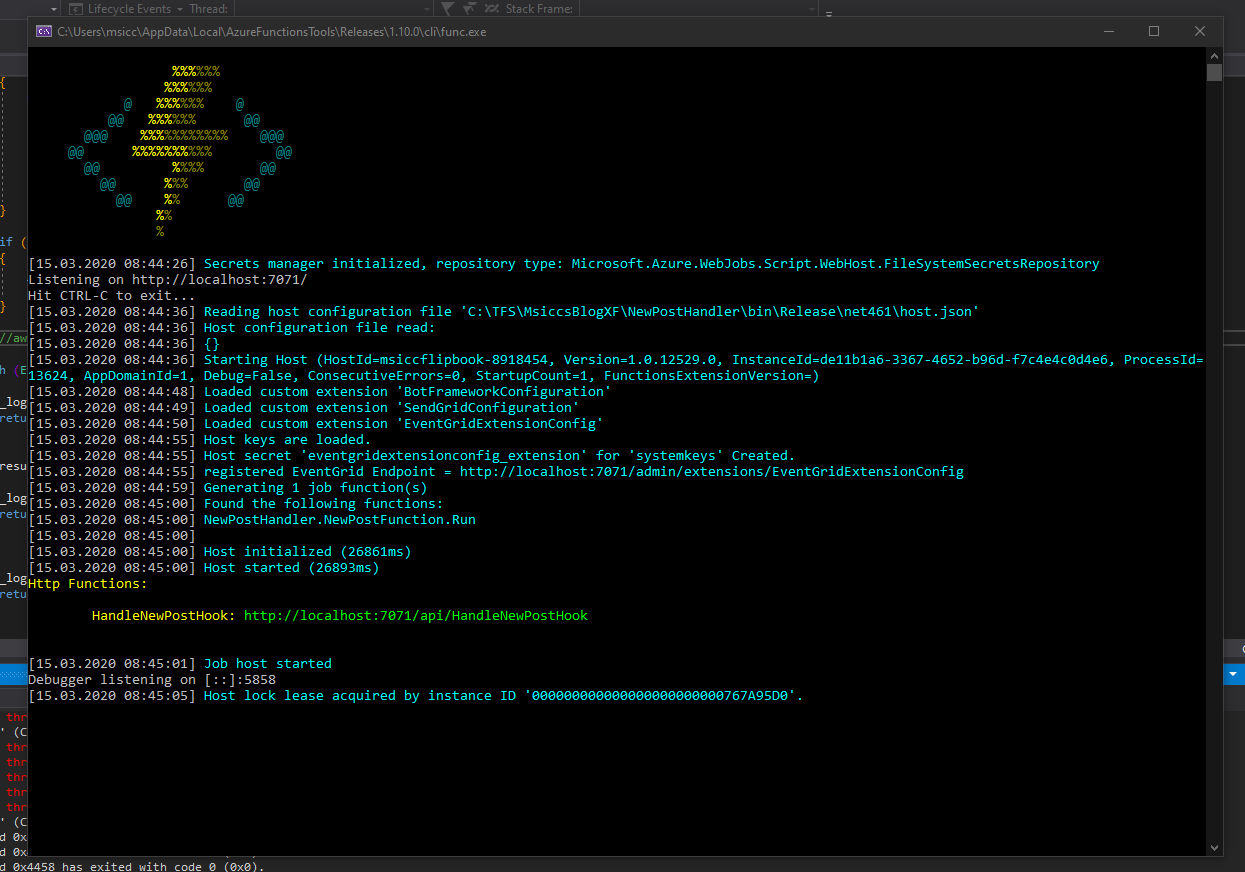
One of the reasons I chose to start the Function in Visual Studio is its ability to debug it locally. If you don’t have the necessary tools installed, Visual Studio will prompt you to do so. After installing them, you’ll be able to follow along.
 Once the service is running, we will be able to test our function. If you haven’t already heard about it, Postman will be the easiest tool for that. Copy the function url and paste it into the url field in Postman. Next, add a sample JSON payload to the body (settings: raw, JSON) and hit the ‘Send’ button:
 If all goes well, Postman will give you a success response:
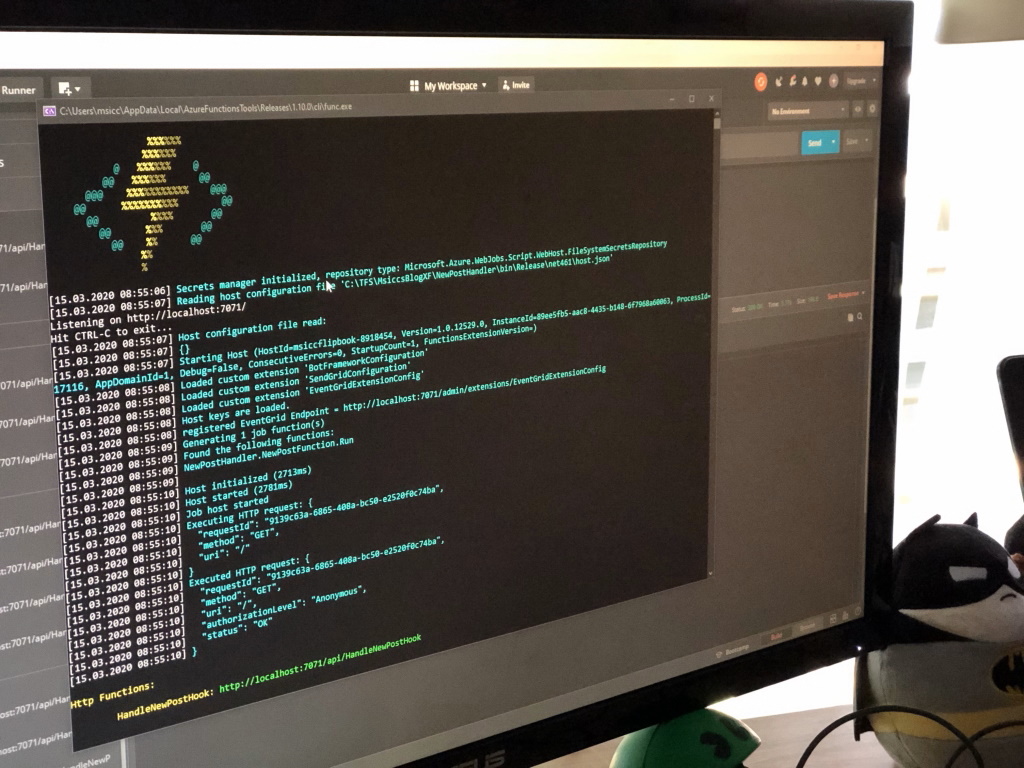
 The Azure CLI will also write some output:
As you can see, all of our log entries were written to the CLI, plus some additional information from Azure itself. Don’t worry for the moment about the anonymous authorization state, this is just because we are running locally. In theory, we could already publish the function to Azure now. As we know that we will extend the Function in the next post, however, we will not do this right now.
Conclusion
As you can see, writing an Azure Function isn’t as complicated as it sounds. Visual Studio brings all the tools you need to get started pretty fast. The ability to test the Function code locally is another big advantage that comes with Visual Studio.
In the next post, we will configure the NotificationHub on Azure and extend our Function to call into it and fire the notifications.
