Sending push notifications to your Xamarin app from WordPress with Azure, Part I [new series]
Overview
Choosing the “right” solution for sending push notifications isn’t easy if you have a WordPress blog. There are quite a bunch of options to choose from, and the right one for you might differ from my decision. I am using the most generic solution – a Webhook that triggers an Azure Function, which triggers the notification via Azure Notification Hubs. This series will grow as follows:
- Preparing your WordPress (blog/site) (this post)
- Preparing the Azure Function and connect the Webhook
- Preparing the Notification Hub
- Send the notification to Android
- Send the notification to iOS
- Adding in Xamarin.Forms
The app implementations are very platform-specific, but it is quite easy to integrate the post notifications in a Xamarin.Forms app (which will be the last post in this series). If you want to see the whole integration already in action, feel free to download my blog reader app:
MSicc’s Blog version 1.6.0 out now for Android and iOS
WordPress plugins for the win
If you have a self-hosted blog like I do, you may know that the plugin ecosystem is there to help you with a lot of things that WordPress hasn’t out of the box. While a WordPress-hosted site as Webhook integration without an additional plugin, we need one to create such a Webhook on a self-hosted WordPress blog. The plugin I am using is simply called “Notification” and can be found here.
To install the plugin, follow these simple steps:
- choose “Plugins” on your WordPress dashboard
- select “Add New” and type in “notification”
- Hit the “Install Now” button
- Activate the plugin
Exploring the options
Once you have installed and activated the plugin, you will have a new option in the dashboard menu. Let’s have a look at the options.
- Notifications – this shows you a list of your currently active notifications
- Add New Notification – lets you create a new notification
- Extensions – the plugin allows you to extend your notifications with external services like Slack, Twitter or SendGrid to engage even more users. We do not need these for the webhook, however.
- Settings – the control panel for the plugin – this is where we will be for the rest of this blog
Enabling the Webhook
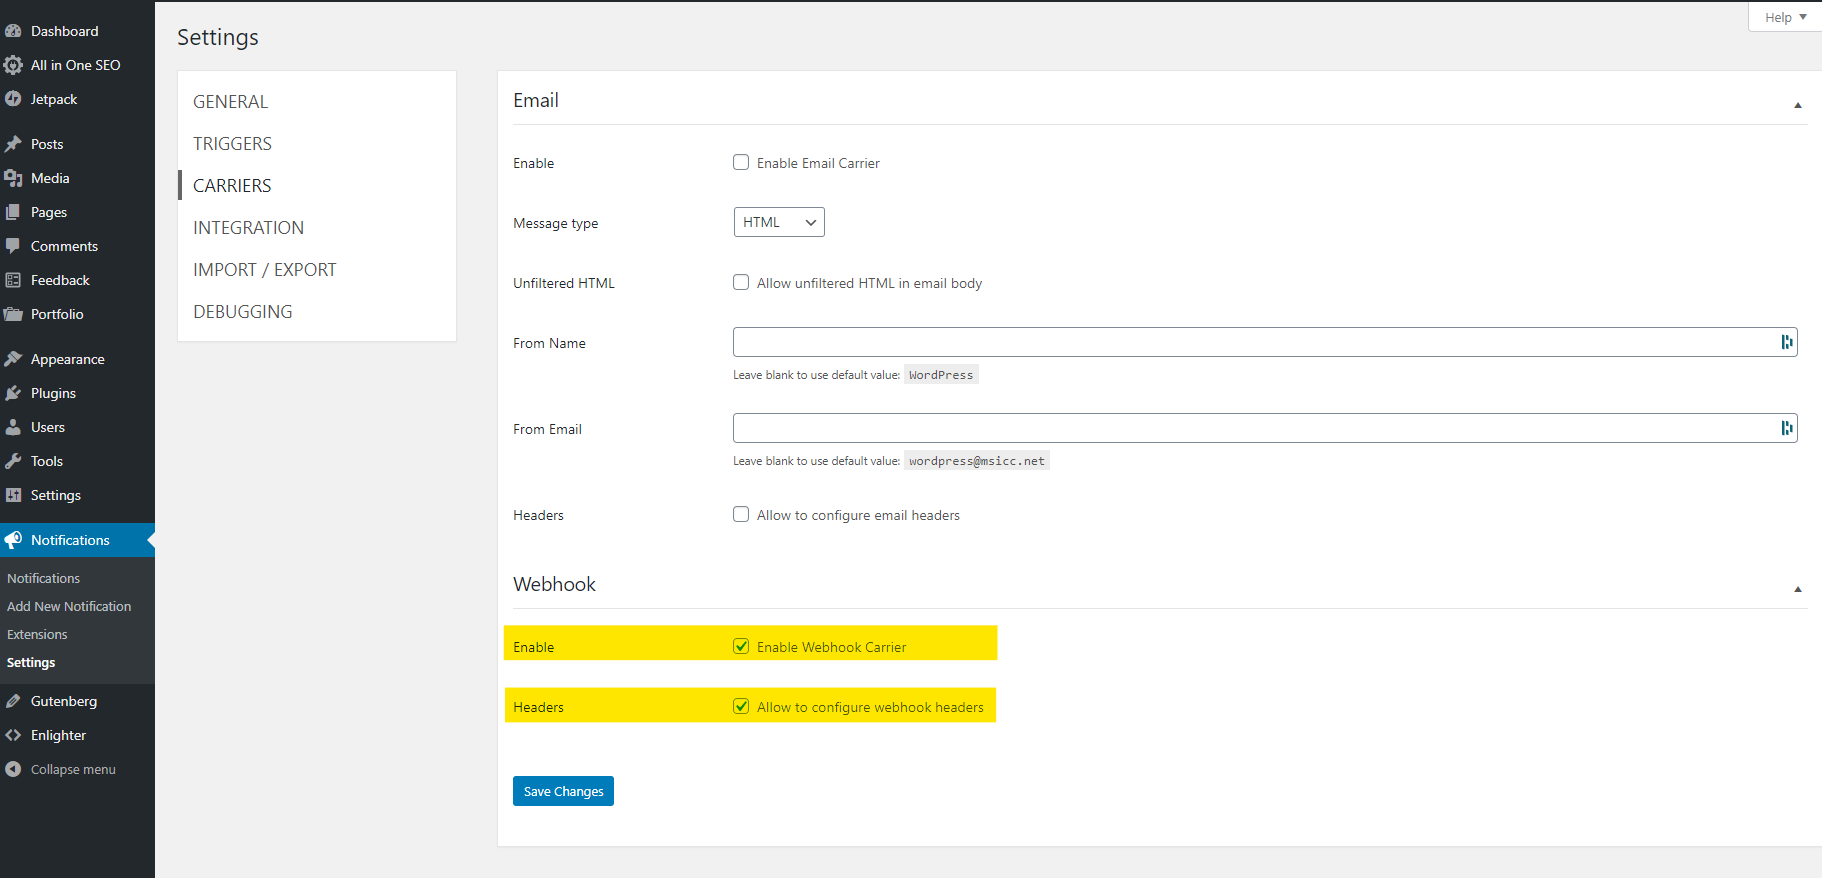
On the Settings page, select the “CARRIERS” option. The plugin uses so-called carriers to send out the notifications. By default, the Email carrier is active. I do not need this one for the moment, so I deactivated it an activated the Webhook carrier instead:
Setting Post Triggers
The next step is to verify we have the trigger for posts active:
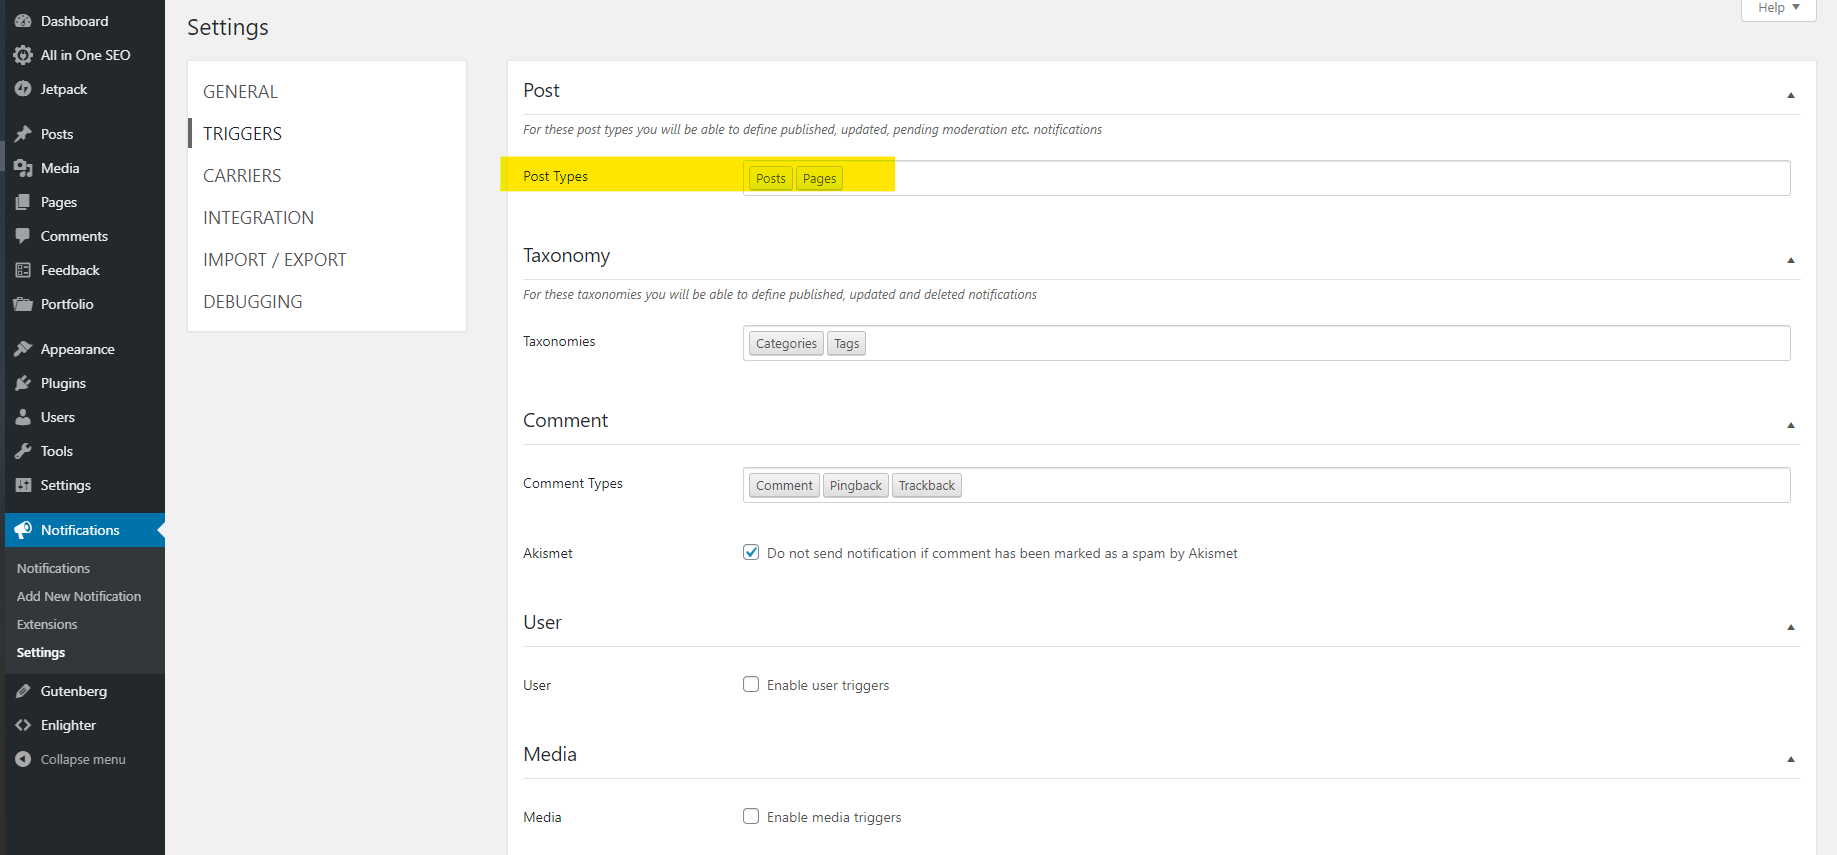 You can modify the other triggers as well, but for the moment, I am focusing just on posts. I am thinking about integrating comments in the future, which will allow even more interaction from within my app.
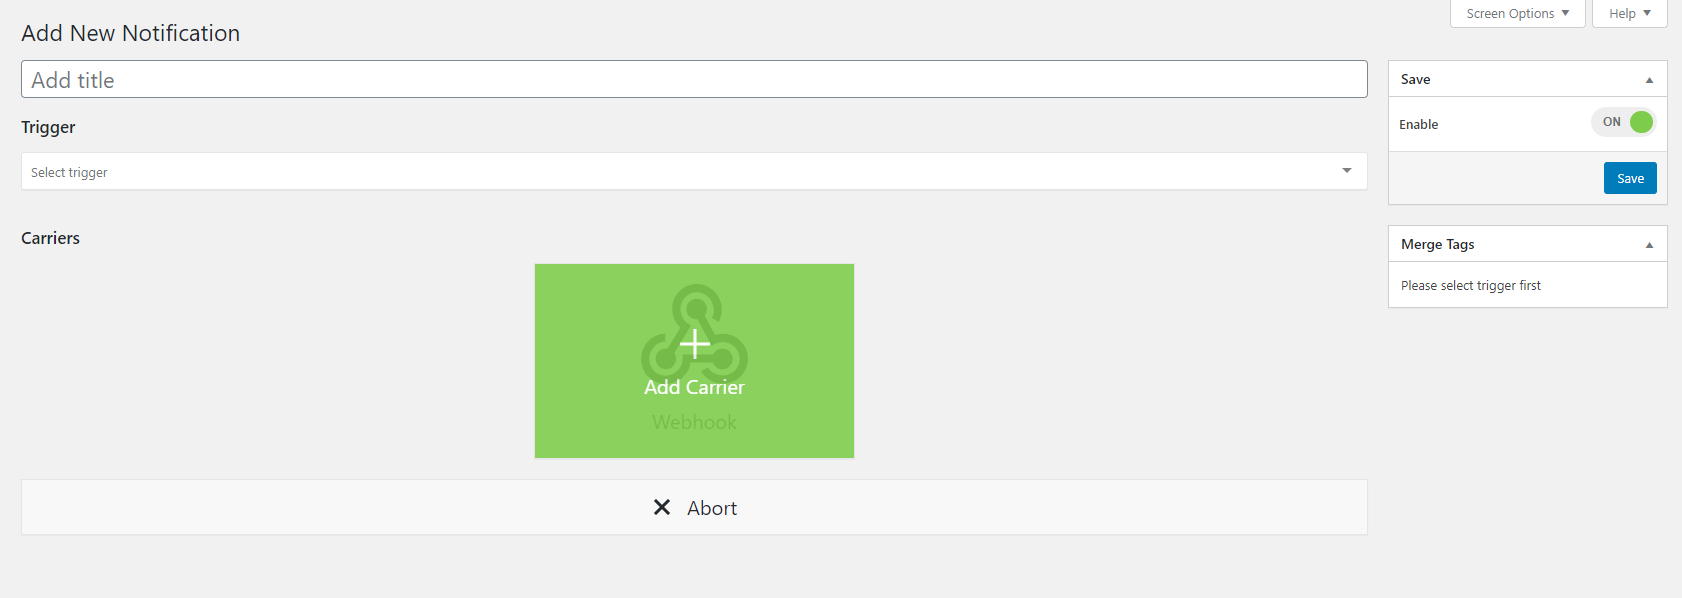
Add a new notification
Let’s create our first notification. Select the “Add New Notification” action, which will bring up this page:
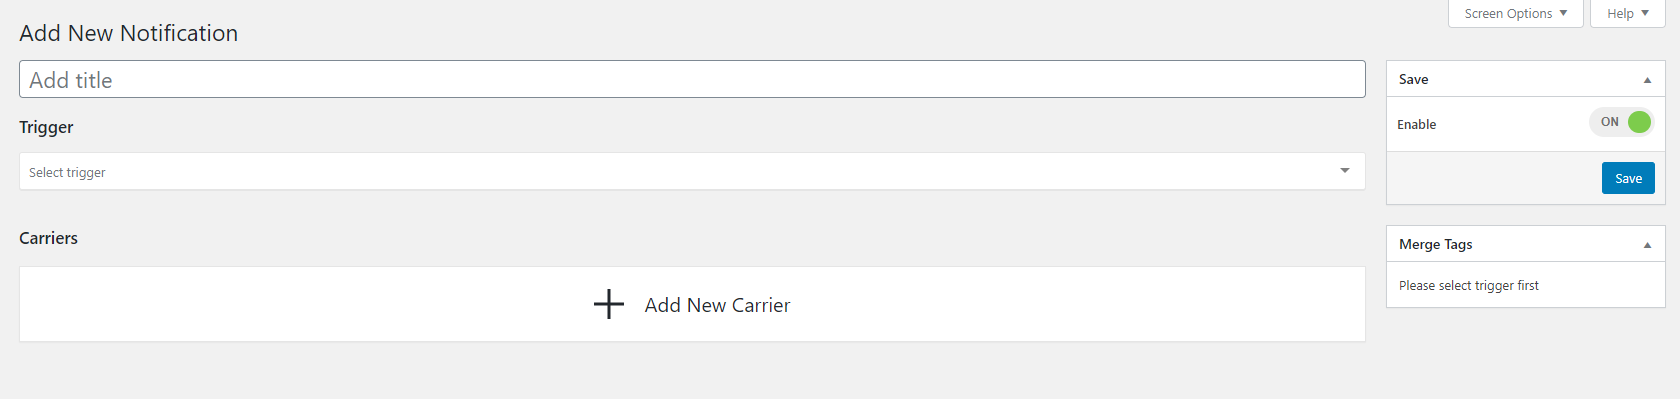
Select the “Add New Carrier” option and add the Webhook carrier:
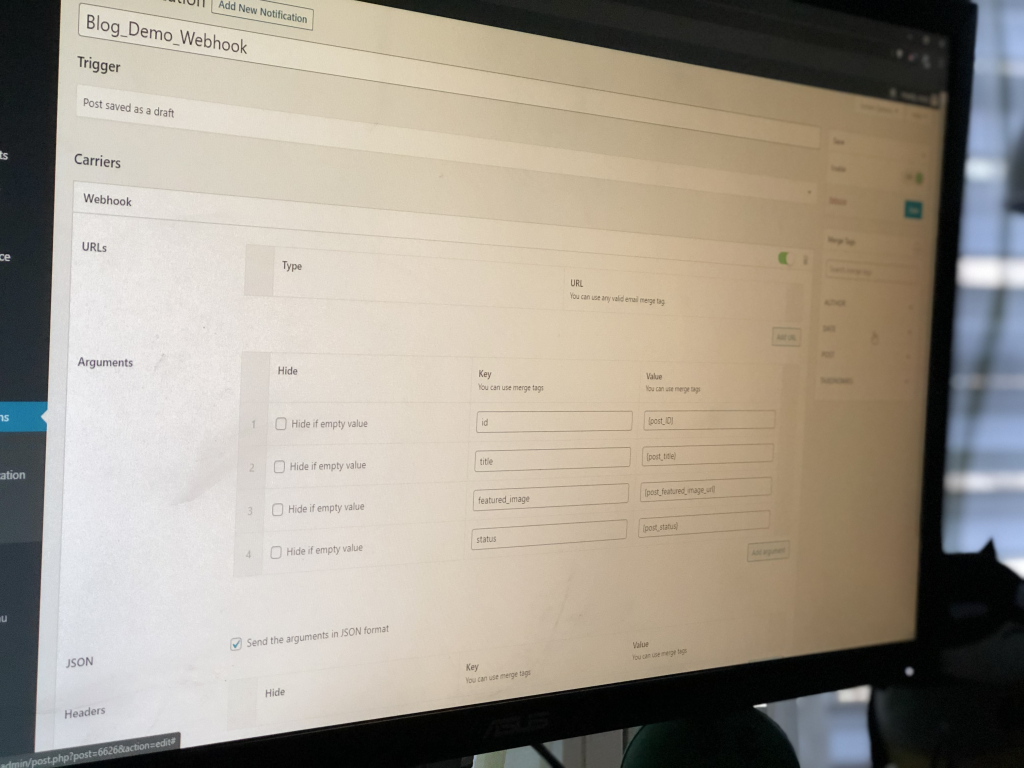
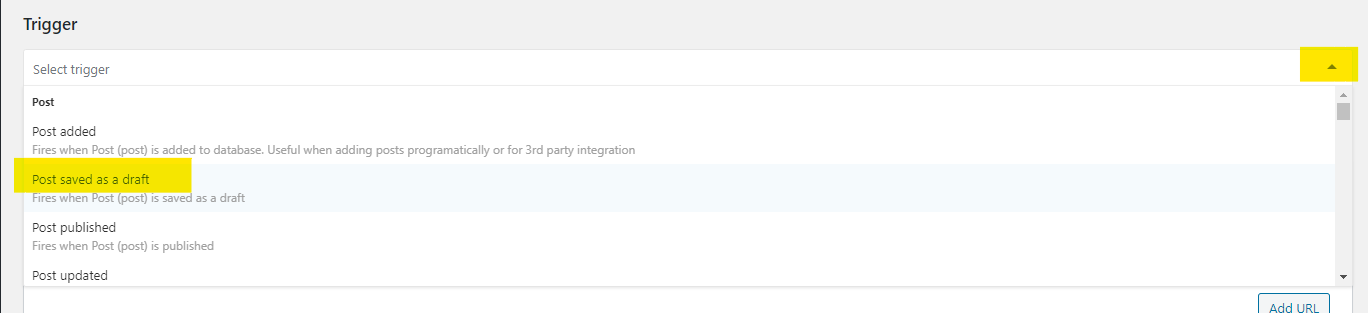
Next, select the Trigger for the Webhook. During development, I am using the saving draft option as it allows me to easily trigger a notification without annoying anyone:
This will enable the “Merge Tags” list on the right-hand side. To create the Webhook payload, we need to add some arguments (using the “Add argument” button). Tip: you can copy the merge tag by just clicking on it and paste it into the “Value” box:
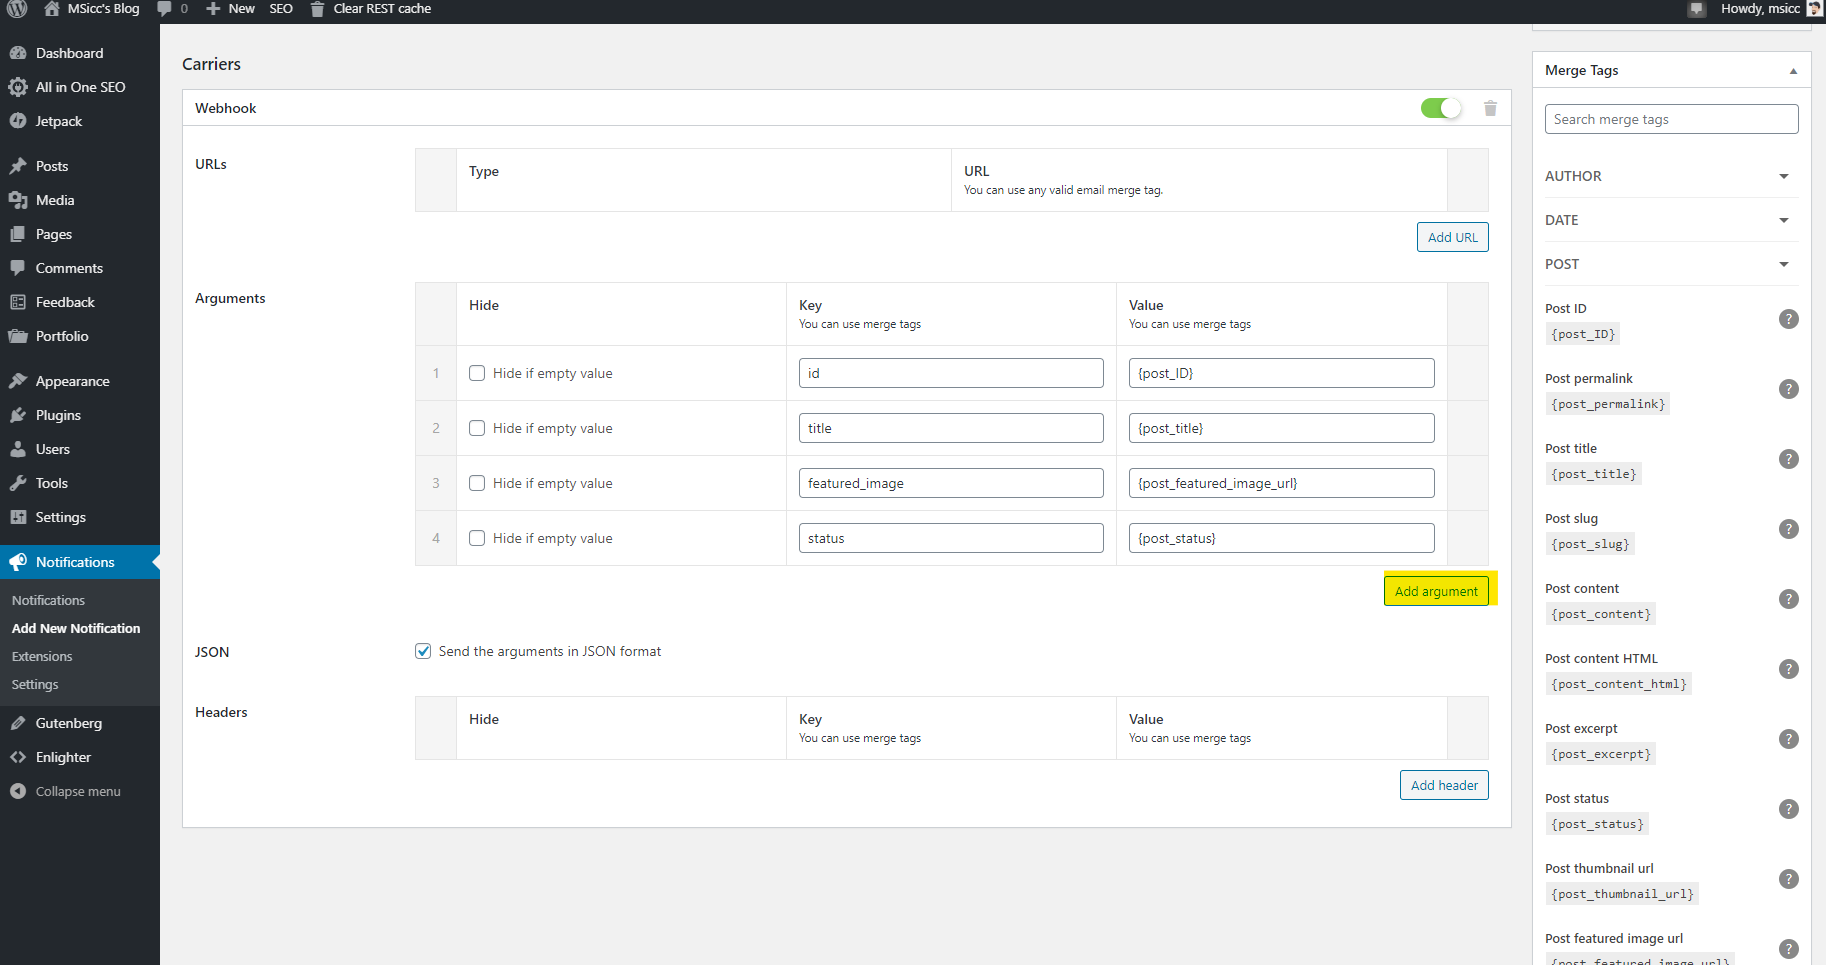
Don’t forget to activate the JSON format – we do not want it to be sent as XML. Make sure the Carrier is enabled and hit the save button on the upper right.
Testing the Webhook
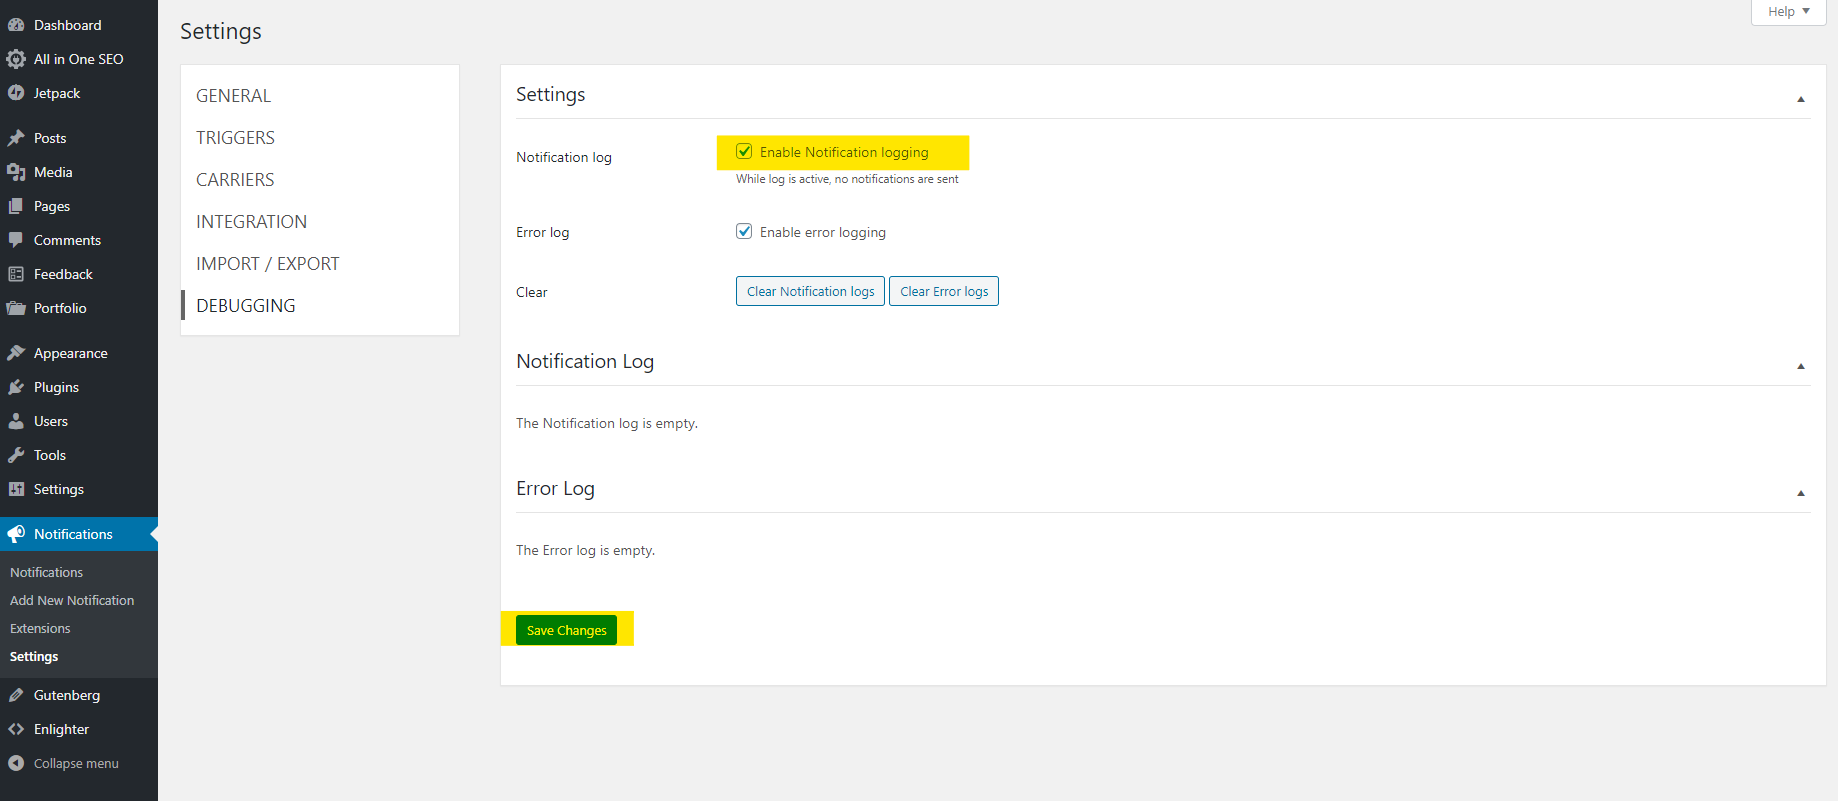
Now that we finished the setup of our Webhook, let’s test it. To do so, go to the “Settings” page again and select “DEBUGGING”. Check the “Enable Notification logging” box and click the “Save Changes” button:
To test the notification, just create a new blog post and save the draft. Go back to the “DEBUGGING” setting, where you will be presented a new Notification log entry. Expanding this log entry, you will see some common data about the notification:
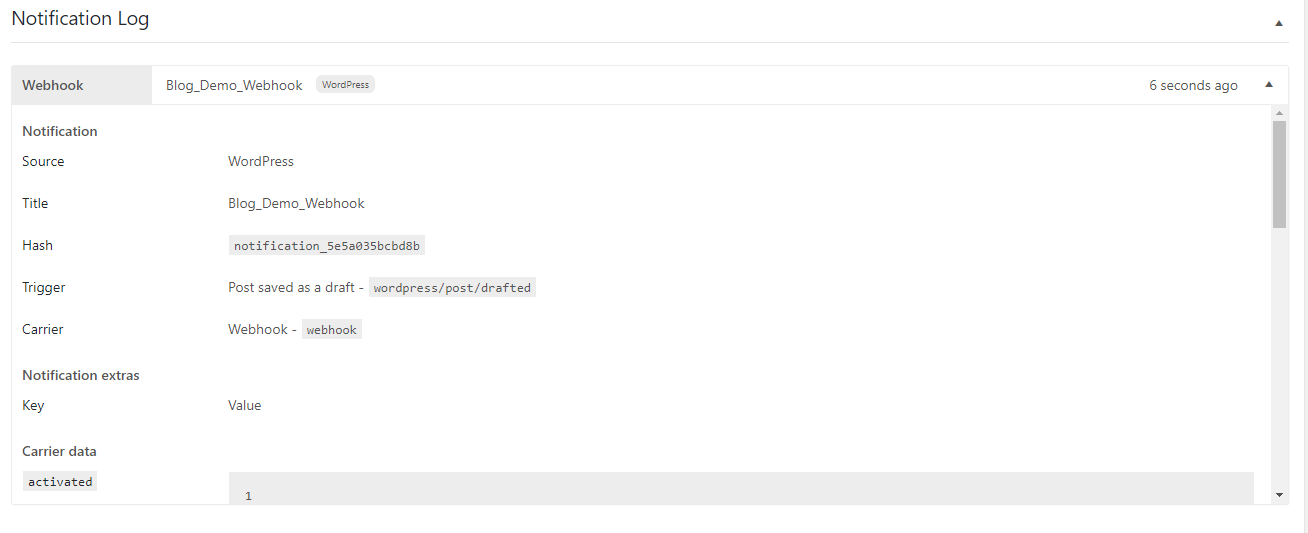
If you scroll a bit further down, you will see the payload of the Webhook. Sadly, you won’t get the raw JSON string, but a structured overview of the payload:

Verify that the payload contains all the data you need and adjust the settings if necessary. Once that is done, we are ready to go to the next blog post (coming soon).
Conclusion
In this post, I showed you how to create a Webhook that will trigger our upcoming Azure Function. Thanks to the “Notification” plugin, the process is pretty straight forward. In the next post, we will have a look at the Azure Function that will handle the Webhook.