How to use the Android emulator on a macOS host for debugging in a virtual machine with Windows
Preface
With .NET MAUI now available, I started to port my Xamarin.Forms applications to the new cool bits. The iOS version of my Fishing Knots app went quite smoothly, but I really had a lot of trouble with the Android version.
First, I did not even get it to compile. After ironing out all the issues Rider was indicating, I finally got it compiling and was able to deploy it to the Android emulator on my Mac, but not to my physical test device (Nokia 5.3). It did not matter if I used Visual Studio for Mac or Rider, the result was always the same. Also, a plain new MAUI app was not deployable.
As I always liked the user experience on Visual Studio for Windows, I decided to give Parallels another try on my machine. I installed Windows and Visual Studio in a Parallels virtual machine and started to test. Guess what? I am able to deploy to both the Android emulator and my test device. Also, debugging with the iOS simulator (and a physical device) works like charm with this constellation.
However, performance in the nested virtualization environment is practically non-existent, so I needed a better solution – the only logical thing was to follow iOS, where we basically debug already on the Mac host. This post shows you how to do so.
One important thing to note here: You need a Pro licence of Parallels to get this stuff running as well. You may be able to follow along with other virtualization providers, but for me, Parallels is the number one address on Mac. Please note also that this solution uses the Visual Studio for Mac installation paths. Additionally, I am assuming you have ssh installed on your Windows VM (GitHub Desktop does this, for example).
Starting the emulator without Visual Studio or Rider
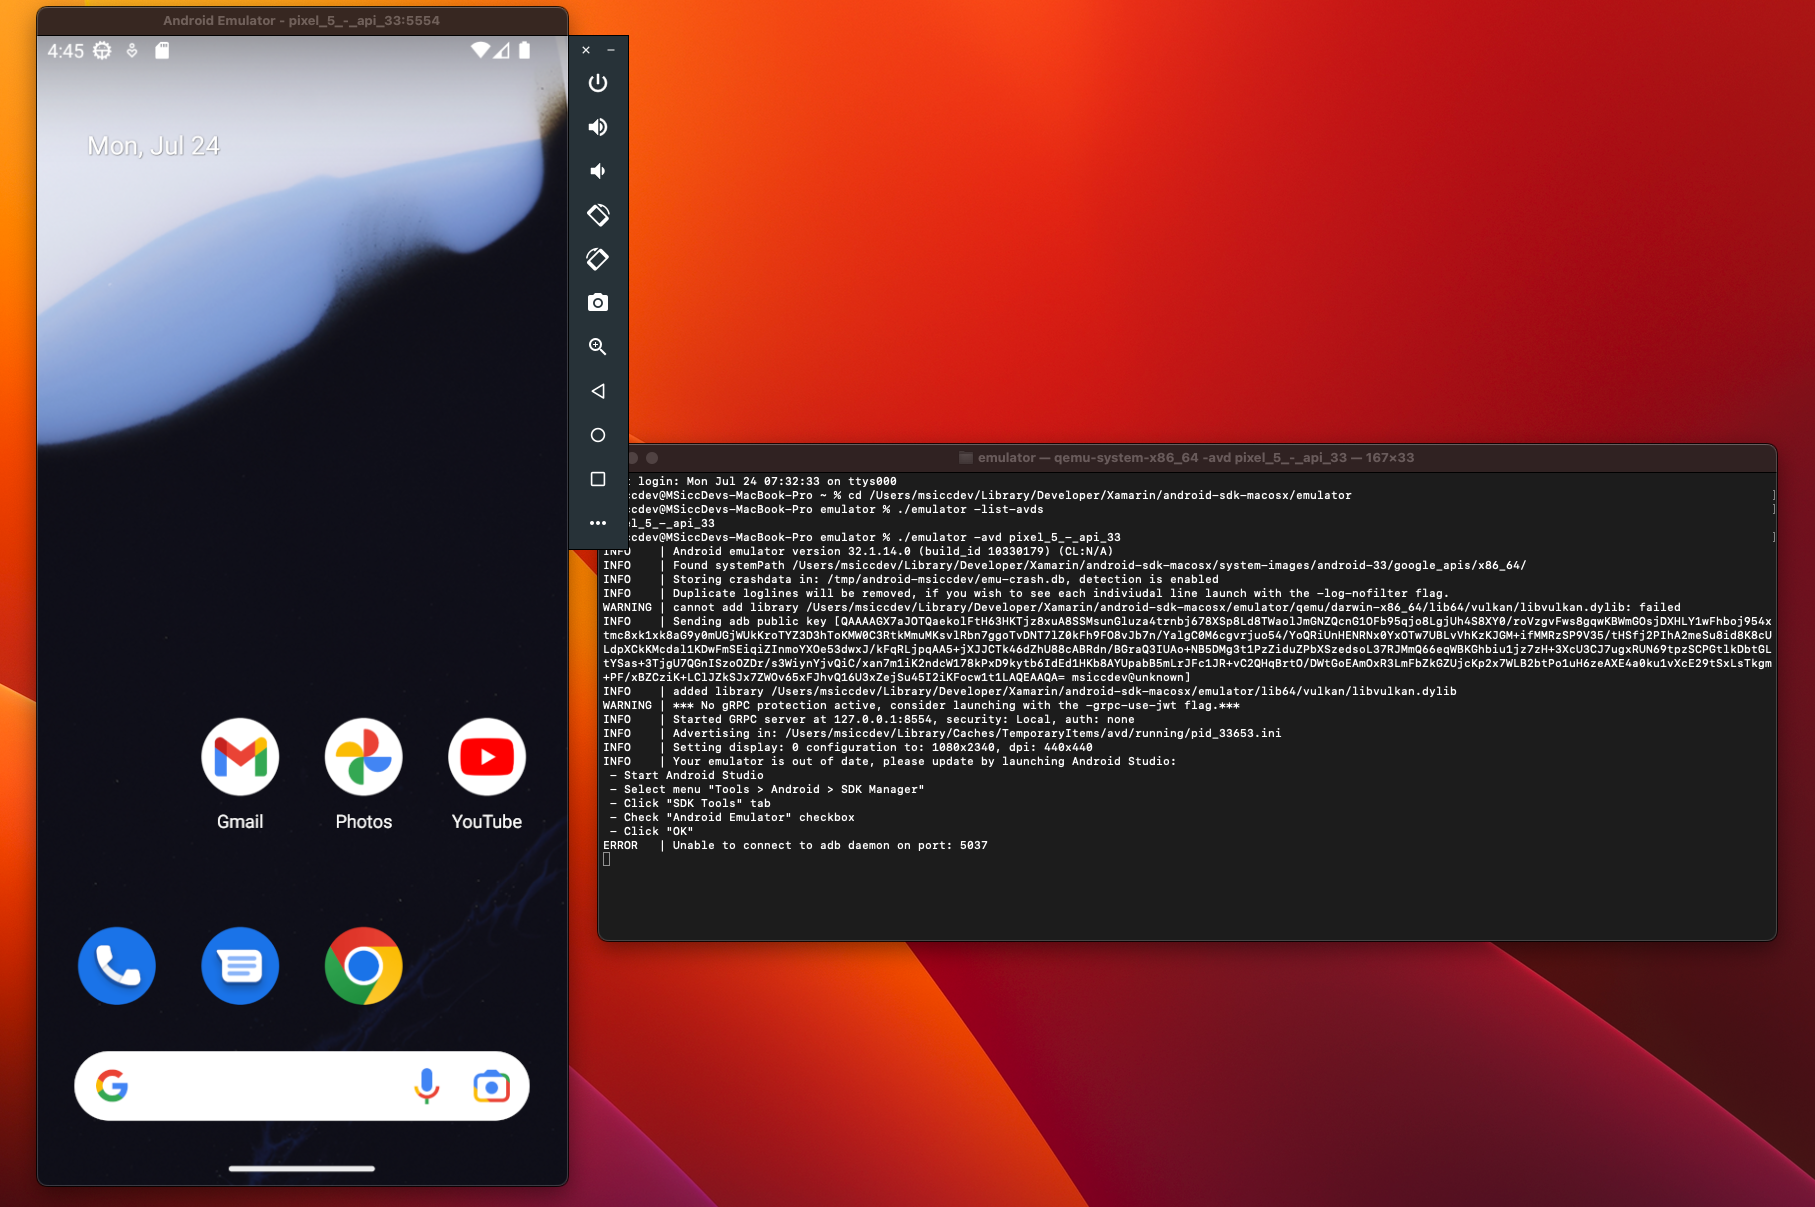
As always, we will run a lot of commands in Terminal for this solution. So let’s open up a new Terminal and open the emulator folder first:
1
 cd /Users/YOURUSERNAME/Library/Developer/Xamarin/android-sdk-macosx/emulator
Now that we are there, let’s see which emulators we have already configured:
1
 ./emulator -list-avds
You should see something like this:
Now start your desired emulator:
1
 ./emulator -avd pixel_5_-_api_33
The emulator should now be started after some info and warning messages appear in the Terminal:
 Last but not least, we need to kill the Android Debug Bridge (adb) server on the mac, as we want Windows to control the emulator. Open up a new terminal (window/tab, as you prefer) and open the platform-tools directory:
1
 cd /Users/YOURUSERNAME/Library/Developer/Xamarin/android-sdk-macosx/platform-tools
Then, stop the Android Debug Bridge server with this command:
1
 ./adb kill-server
If there is no server running, you will receive a Connection refused error message in the Terminal. Otherwise, nothing happens.
Activate Remote Login
If you haven’t done so already, activate Remote Login on your Mac. Open Settings, General, Sharing. In this menu, select “Remote Login” and turn the switch on. After that, click on the “i” and verify that your user is in the list of allowed users. If it is not, add your user from the “+” – menu:
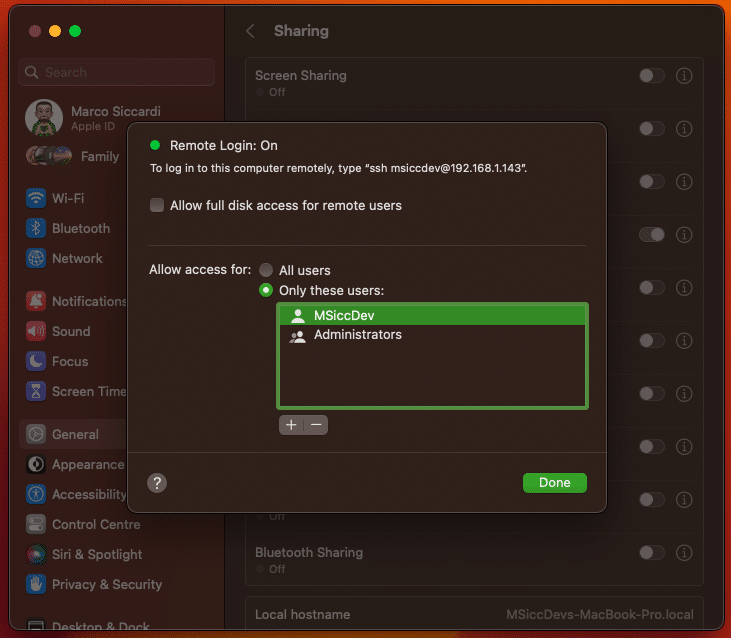 If you want, you can already copy and save the ssh-url from the top of the dialog, as we need that one in the next step.
Verifying the ports
As mentioned in the adb documentation, each emulator has its own pair of ports. To find these ports, run the following command in Terminal:
1
 lsof -iTCP -sTCP:LISTEN -P | grep 'emulator\|qemu'
If you just have one emulator, you should have the port pair 5554 and 5555 in the list. If you have more emulators configured, these ports move up for every additional emulator.
Login to your Mac from Windows with ssh
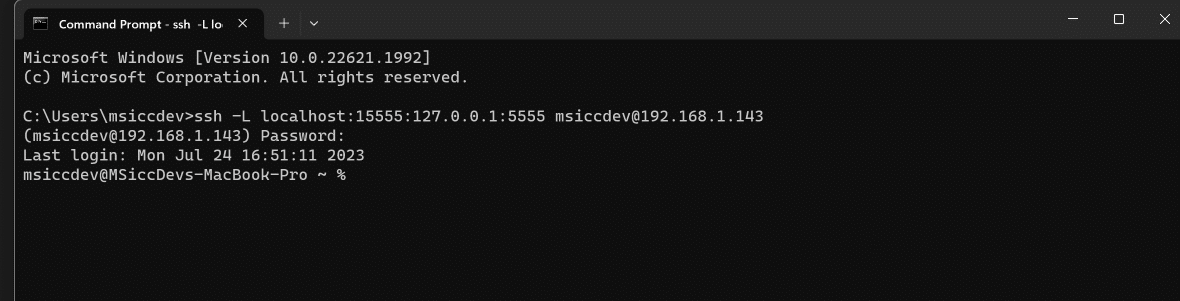
Open am new command line window in your Windows VM. Then type the following command and hit enter:
1
 ssh -L localhost:15555:127.0.0.1:5555 mac-username@ip-address-of-the-mac
If all goes well, you should be asked for your macOS password. Enter the password to start the connection to the Mac. Keep this open until you finish debugging on Android. You should see something similar to this:
 By adding just a ‘1‘ in front of the uneven Mac port of the emulator, you can reroute the port very easily in Windows and have a common scheme for all emulators. Feel free to adapt another scheme if needed/wanted.
Connect adb on Windows to the emulator on your Mac, finally!
Open a new command prompt tab in the Windows Terminal and go to the platform-tools folder:
1
 cd C:\Program Files (x86)\Android\android-sdk\platform-tools
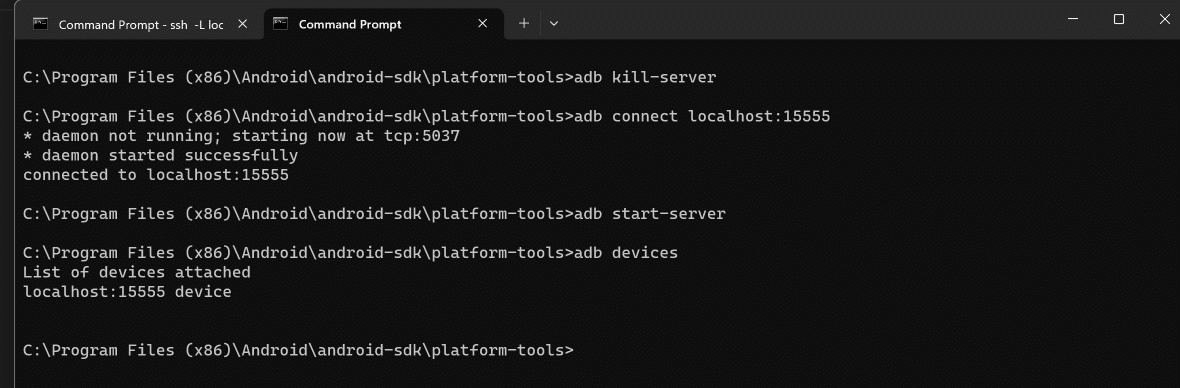
Like on the Mac before, we need to stop the adb server on Windows as well:
1
 adb kill-server
Now we finally connect to the mapped port:
1
 adb connect localhost:15555
This should restart also the adb server. If not, you can restart the server manually by using this command:
1
 adb start-server
Now let’s check if there are any devices mapped already:
1
 adb devices
You should now see your device with the mapped port from above:
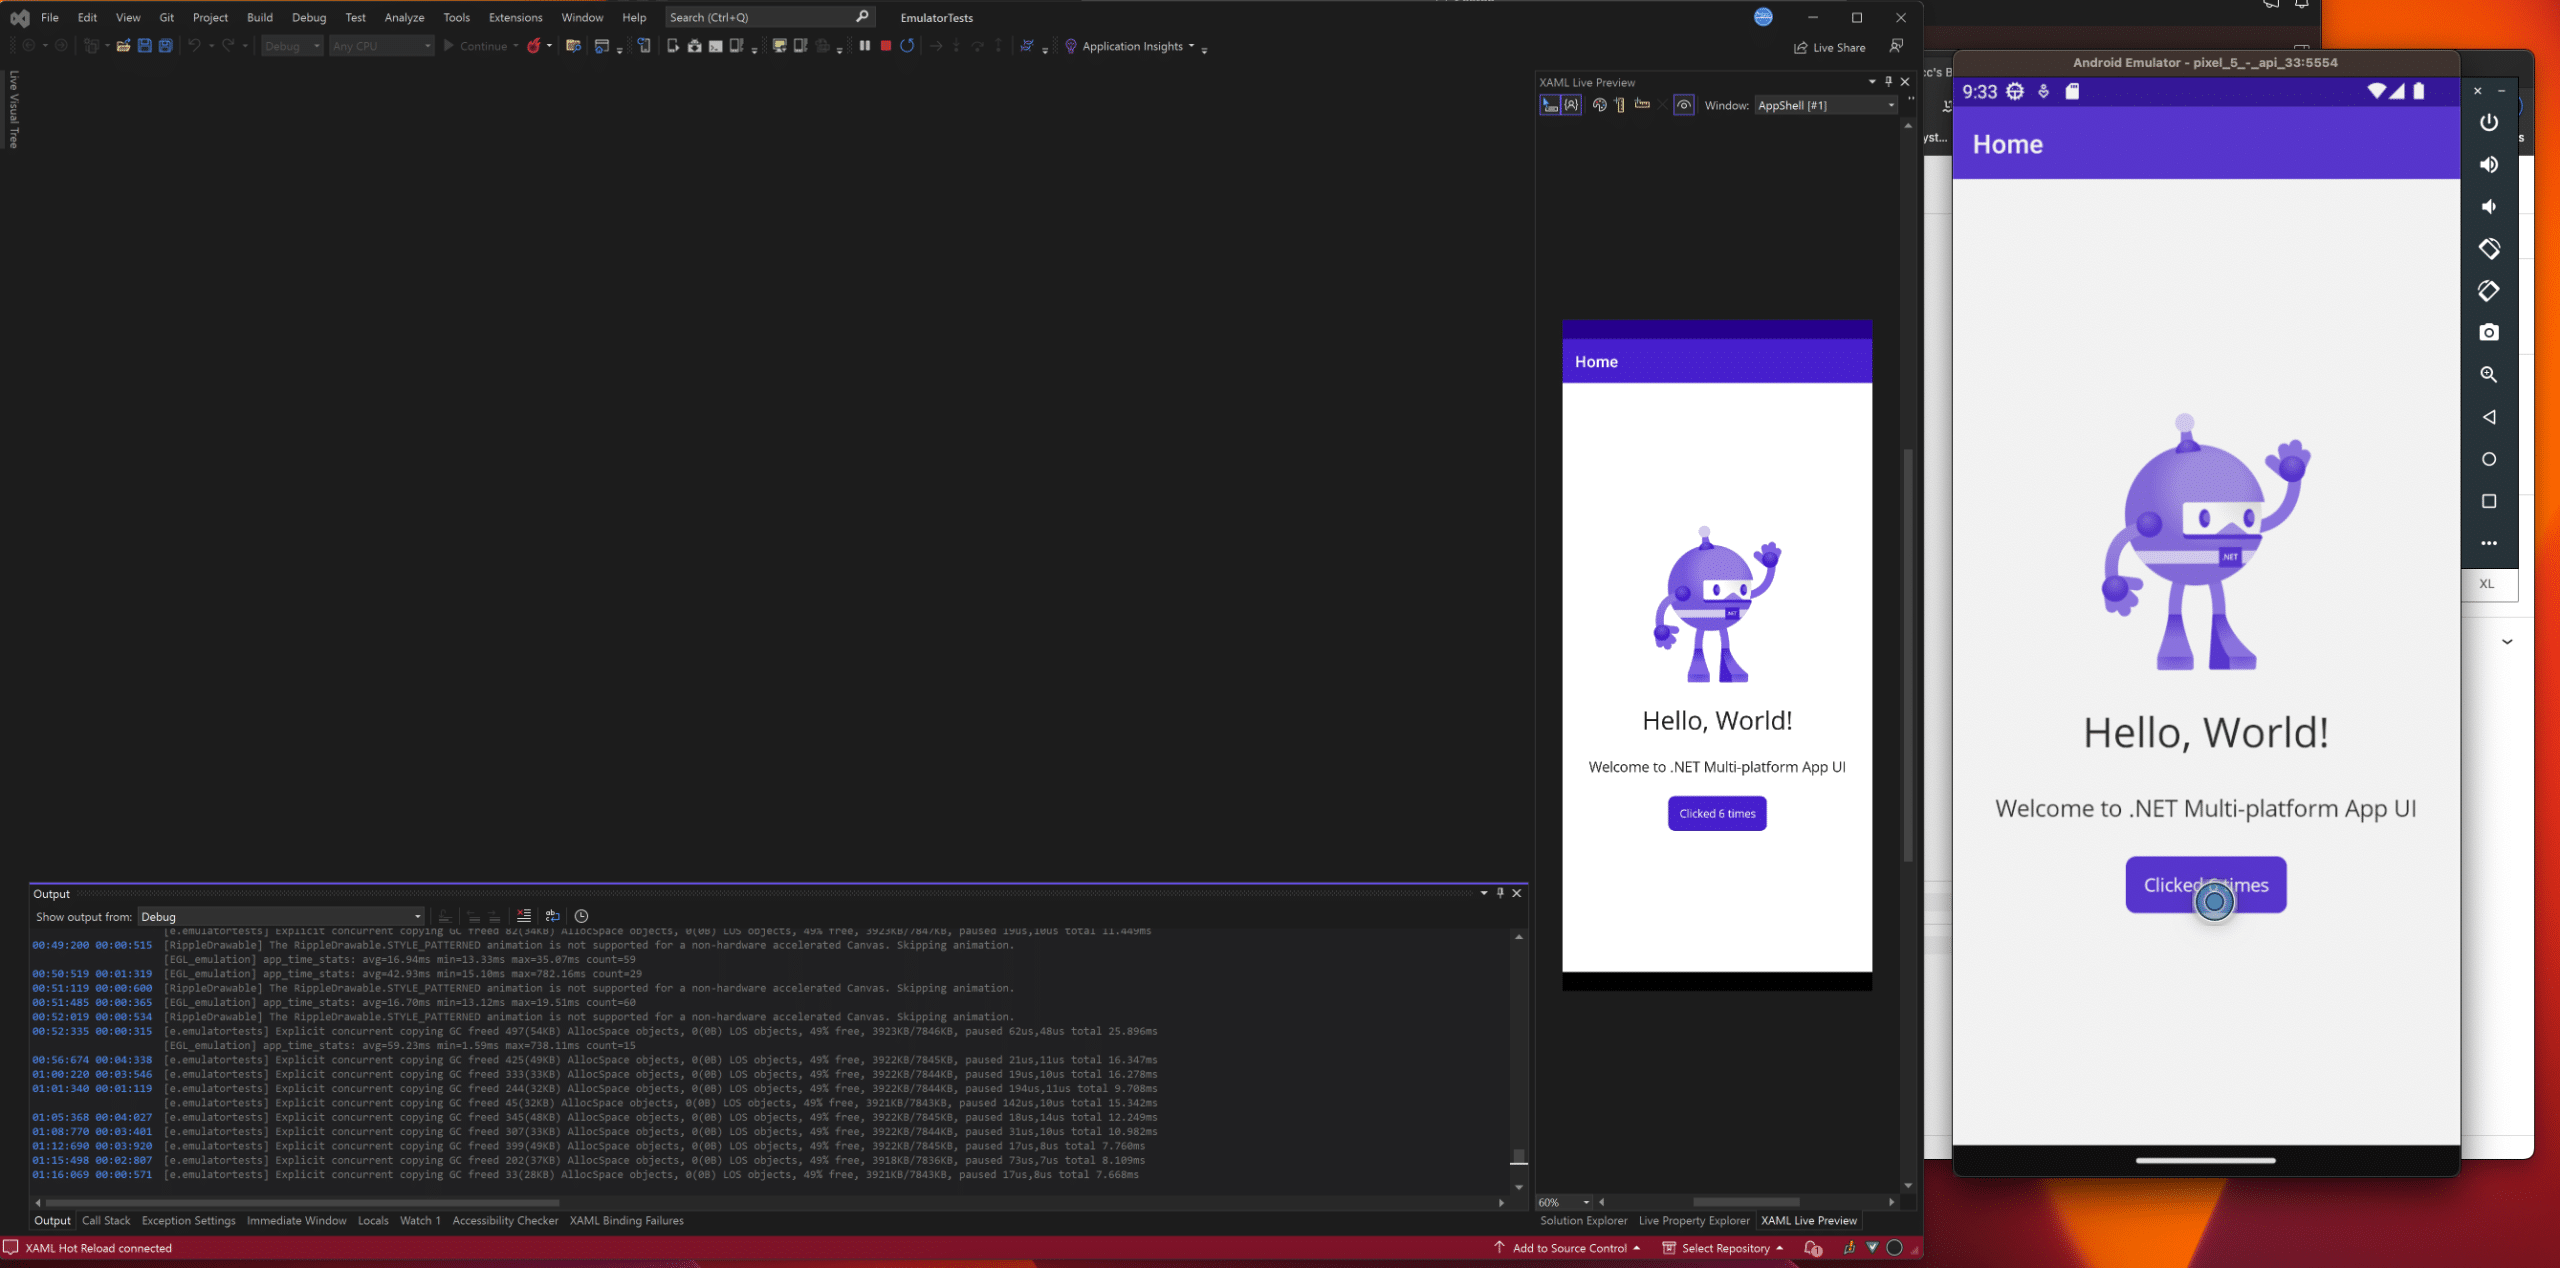
 If you haven’t already, it is now a good time to open Visual Studio in your VM and verify that you can see the device there as well:
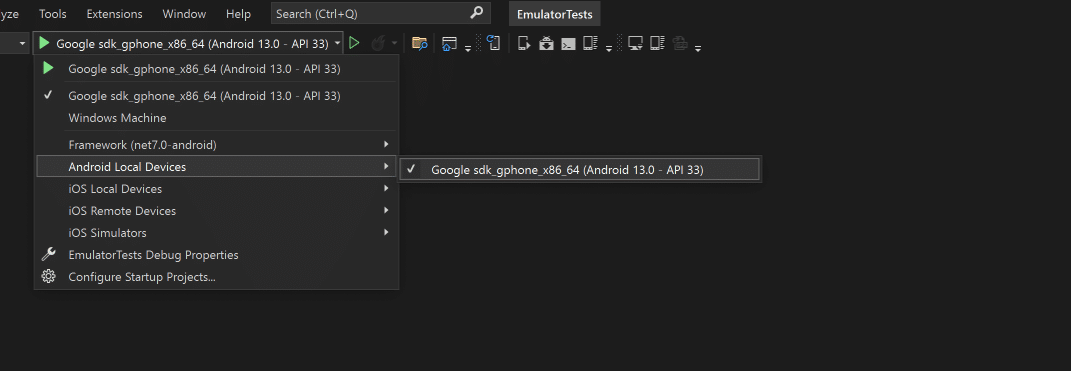 Of course, you want to hit that debug button. If all goes well, you should see the app running in the emulator, like the title image of this post does.
Shutting down
Once we are done (or want to switch to iOS, maybe) with the Android debugging session, we need to shut down the ssh connection and the Android emulator.
First, disconnect from the Mac in the command line window by typing exit and hit ‘Enter‘ on your keyboard. This will close the connection to the Mac. You can now close the Terminal.
Next, head over to your Mac and find the terminal that started your emulator. Hit ‘Control+C‘ on your keyboard to shut down the Android emulator. You can now close this Terminal as well.
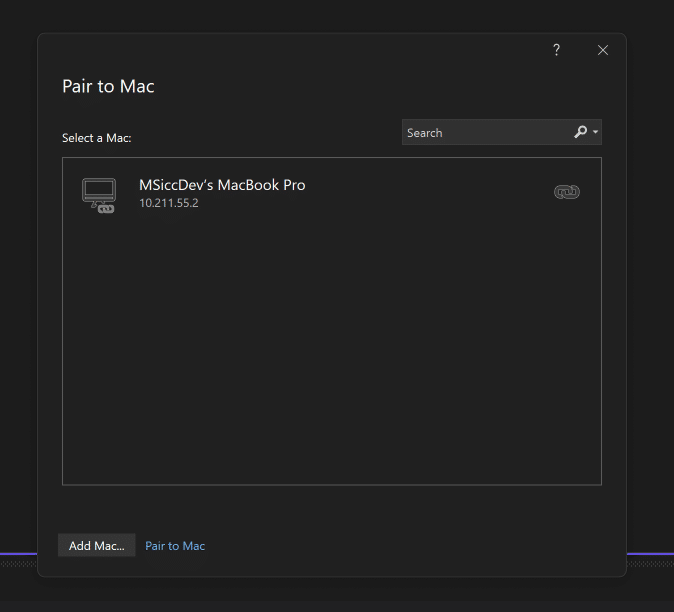
If you need to compile for the iOS simulator, you should now be able to pair to the Mac like always in the Visual Studio dialog:
Conclusion
As I was very unsatisfied with the performance and the problems of VS4Mac/Rider, I decided to give the Parallels construct with Windows another try on my private dev machine. As it turned out, this was a good decision – except for the Android emulator part. However, with the solution above, also that problem is now solved.
As always, I hope this post will be helpful for some of you.
Until the next post, happy coding, everyone!
Helpful links:
https://developer.android.com/tools/adb
https://developer.android.com/studio/run/emulator-commandline