#CASBAN6: Setting up an Azure Functions project for the API

Now that we have our Entity Framework project in place and our DTO mappings ready, it is finally time to create the API for our blogging engine. I am using Azure Functions for this.
Out-of-Process vs. In-Process
Azure Functions can be run in-process or in an isolated process. The isolated project decouples the function app from the underlying process, which enables additional features like custom middleware and Dependency Injection. Besides that, it allows you to run non-LTS versions, which can be helpful sometimes. These were the main reasons for choosing the Out-of-Process model. If you want to learn more about that topic, I recommend reading the docs.
Create the project
As you may have noticed, I recently became kind of a fan of JetBrains’ Rider IDE. Some steps may be different if done in Visual Studio, but you will be able to follow along.
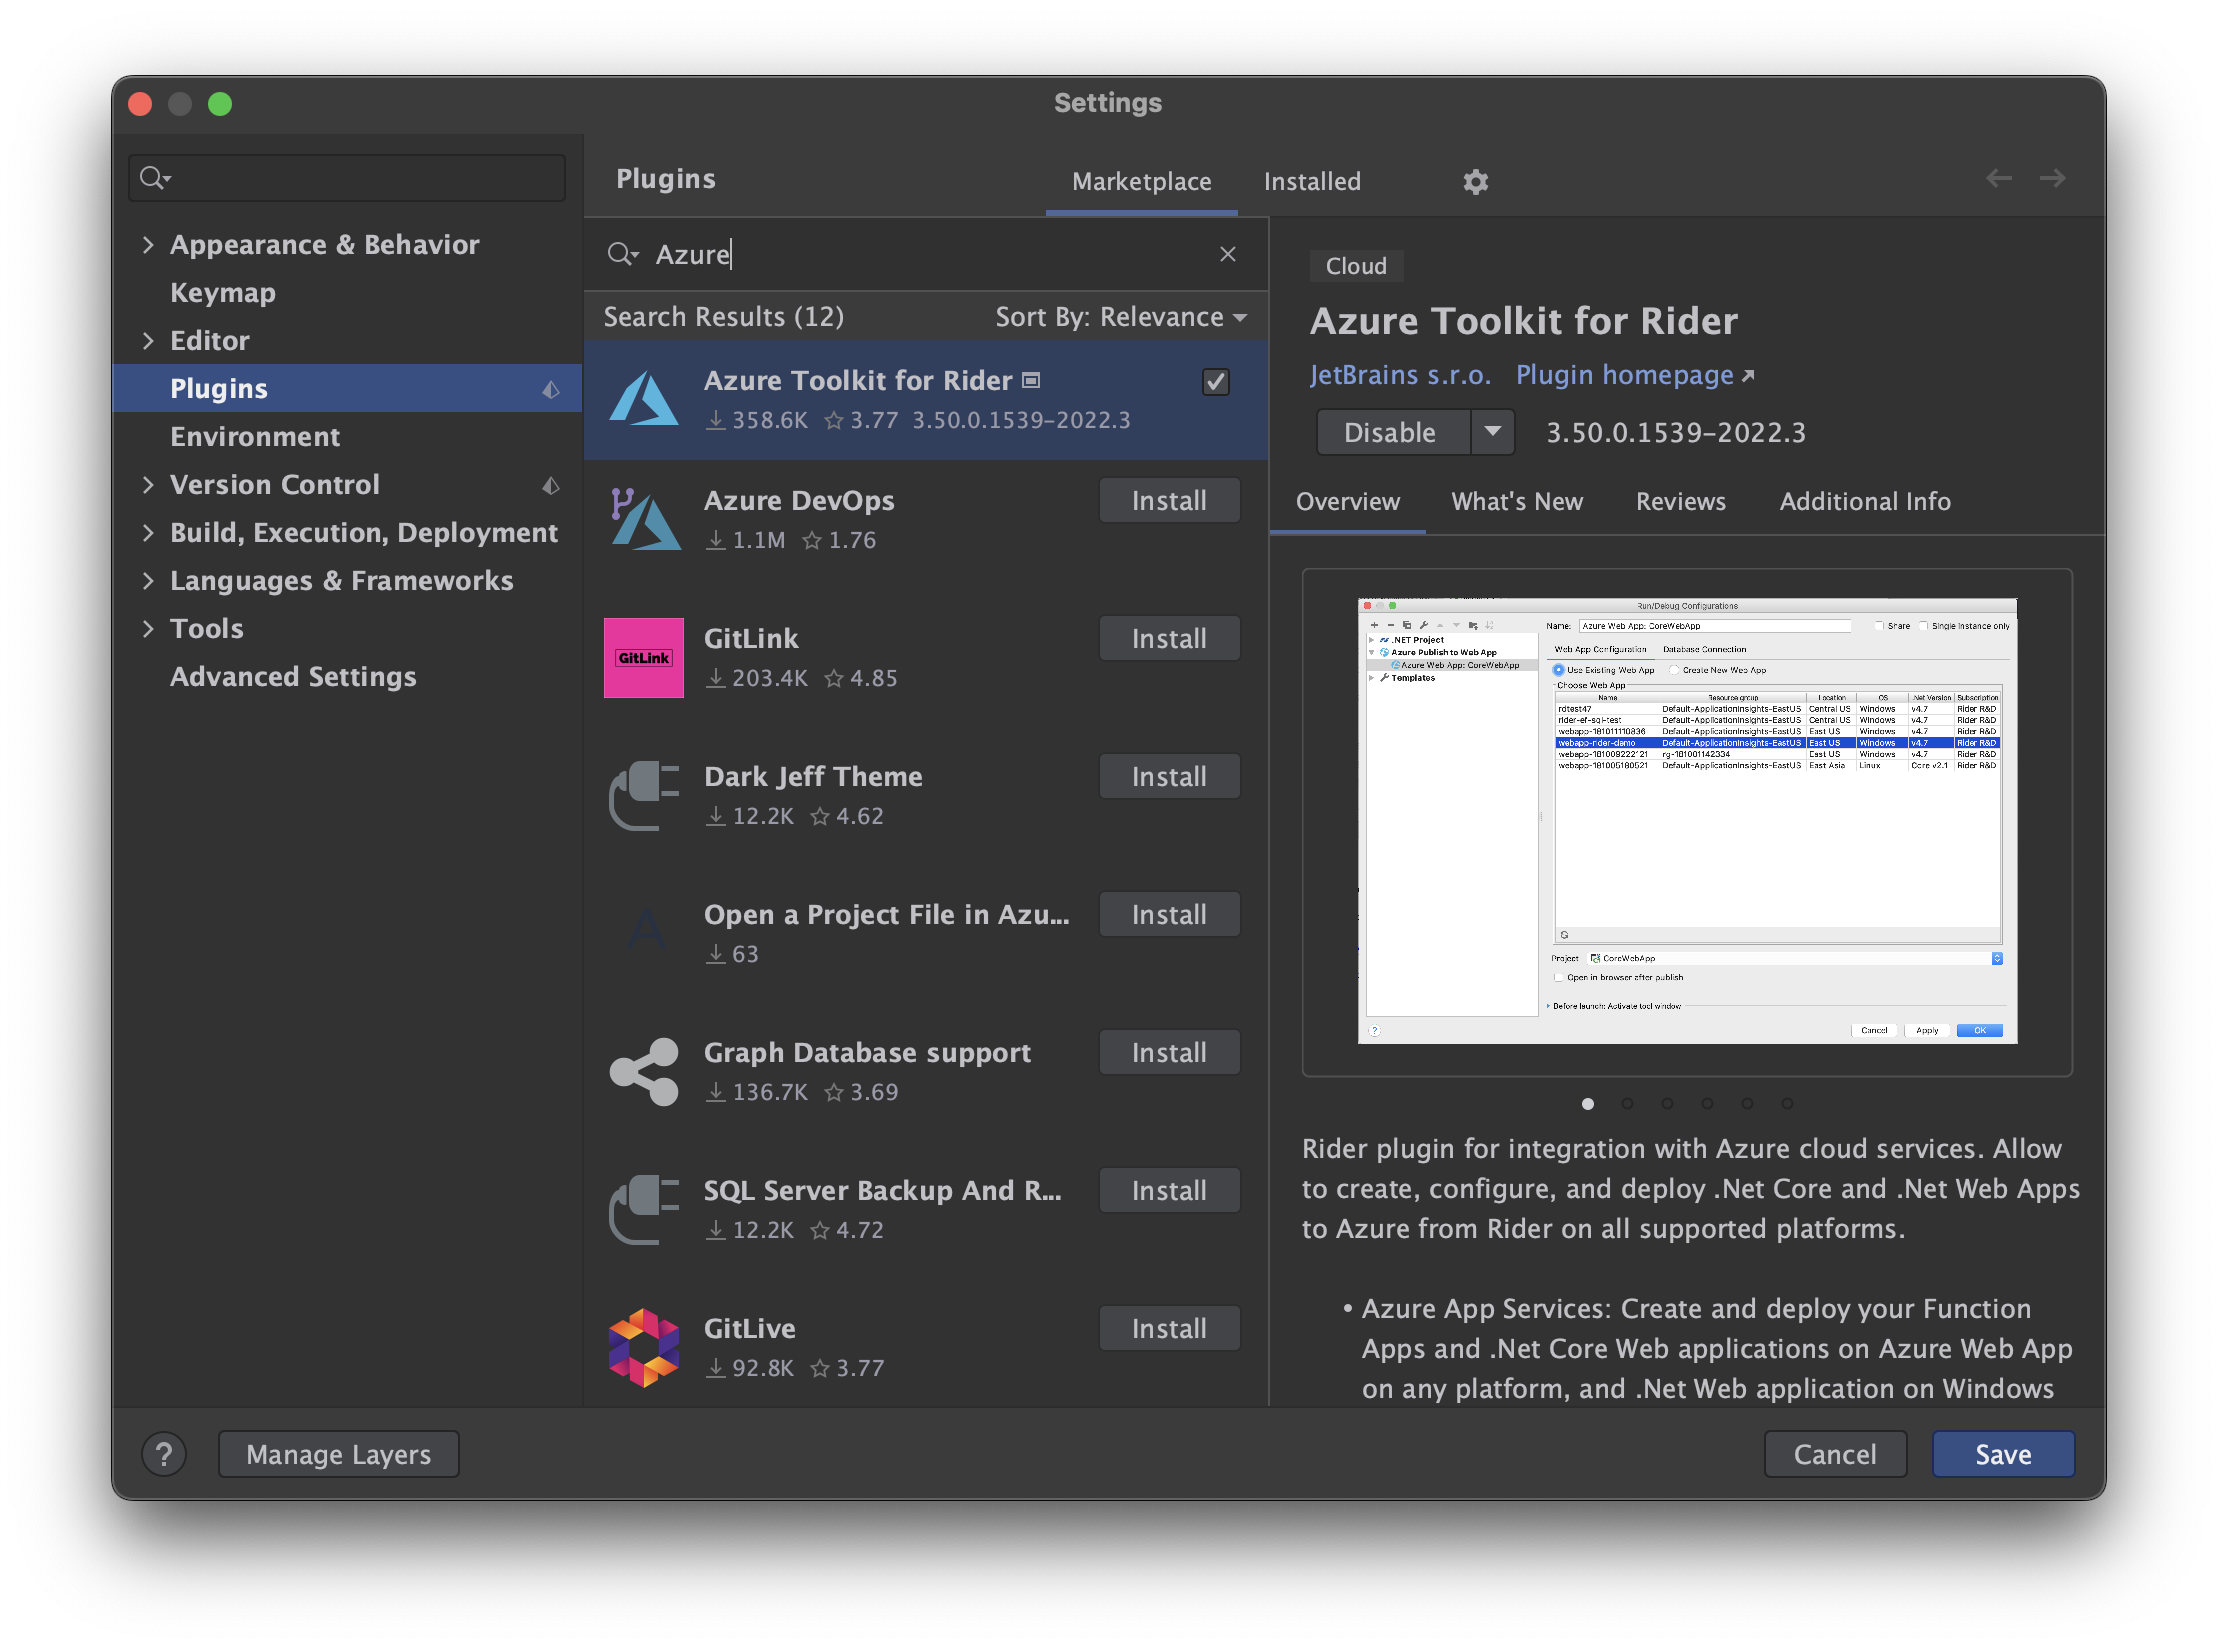
First, make sure you have the Azure plugin installed. Go to the Settings, and select Plugins on the list at the left-hand side. Search for ‘Azure’ and install the Azure Toolkit for Rider. You will need to restart the application.
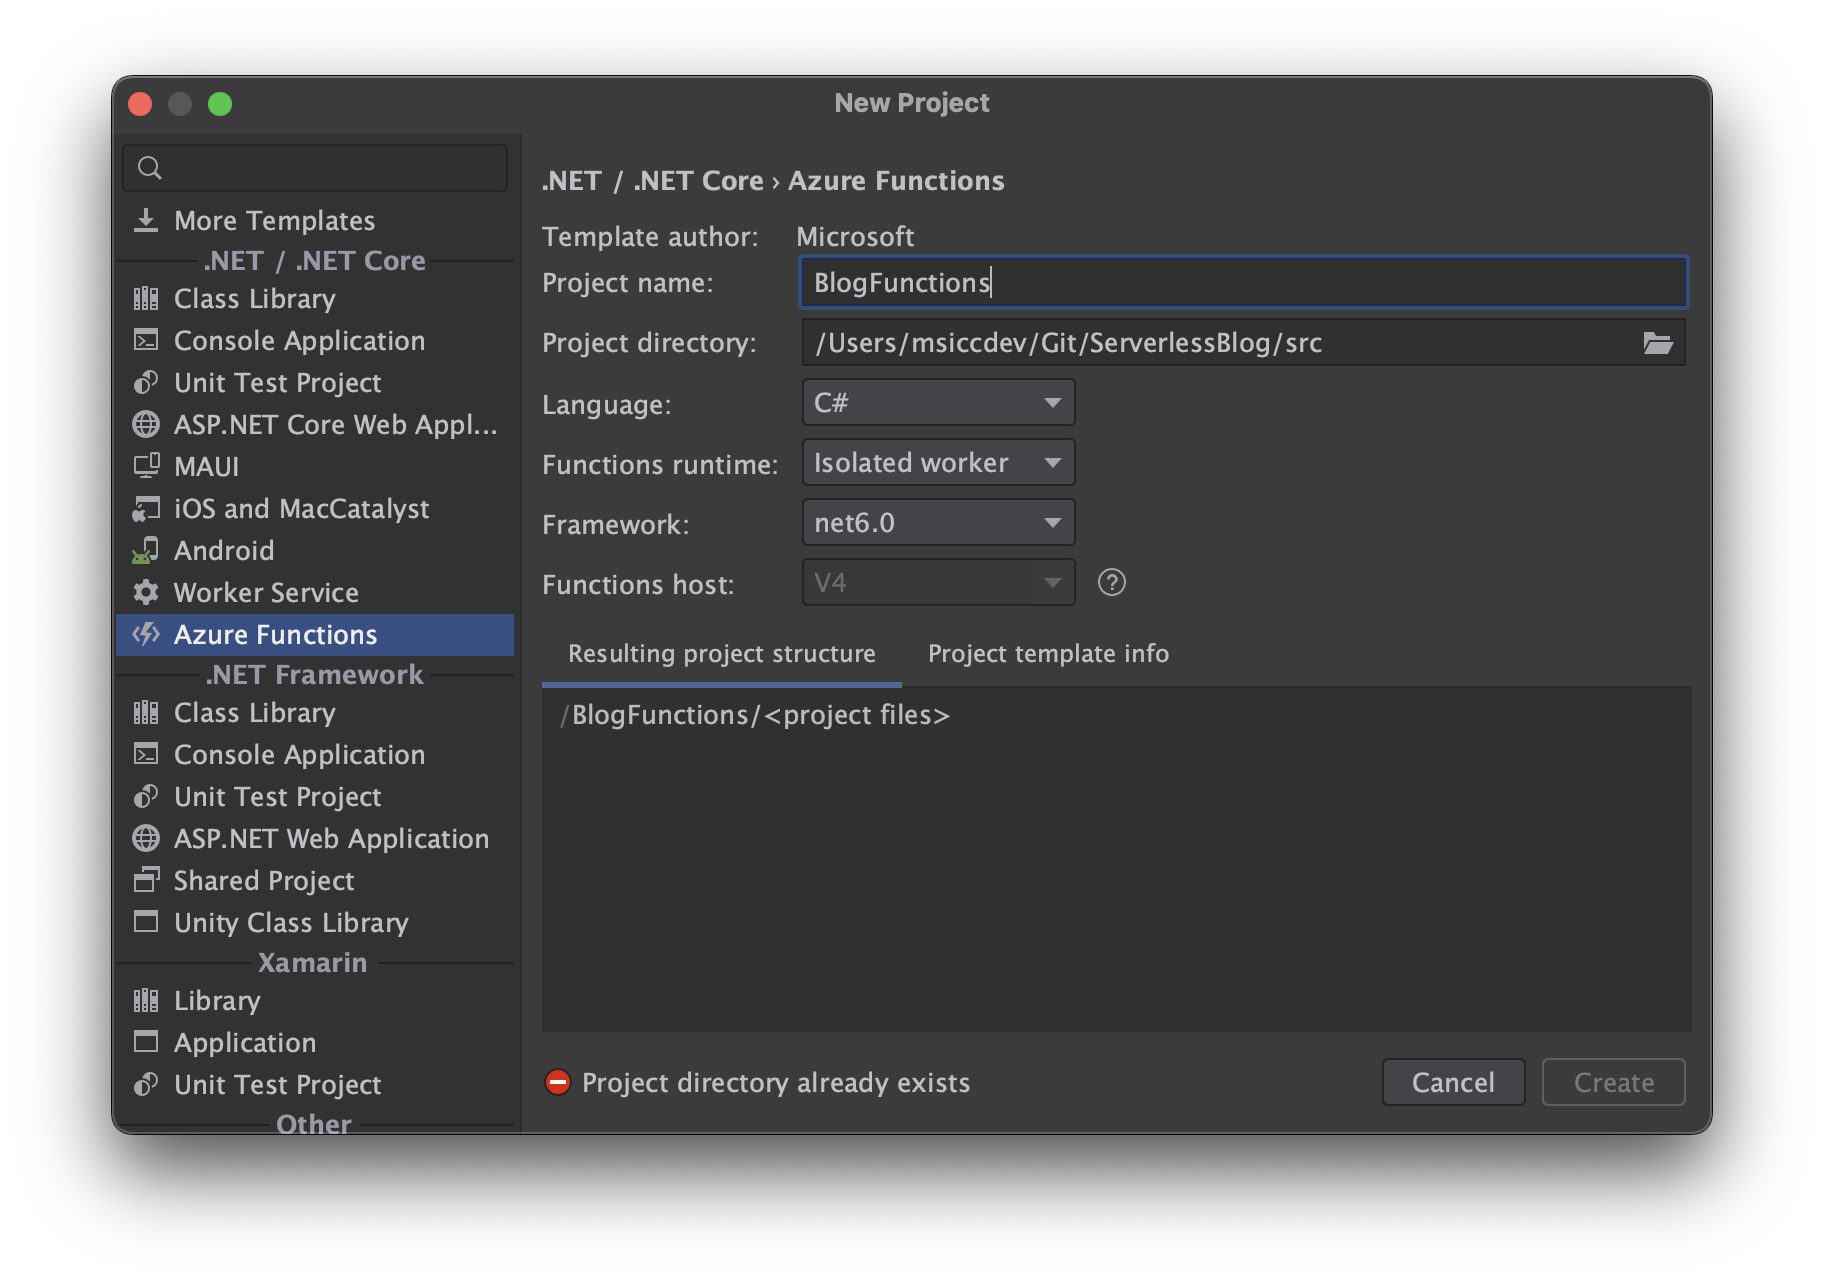
 Once you have the plugin installed, open your solution and create a new project in it (I made it in a separate folder). Select the Azure Functions template on the left.
 I named the project
 BlogFunctions. Select the Isolated worker runtime option, and as Framework, we keep it on .NET 6 for the time being.
NuGet packages and project references
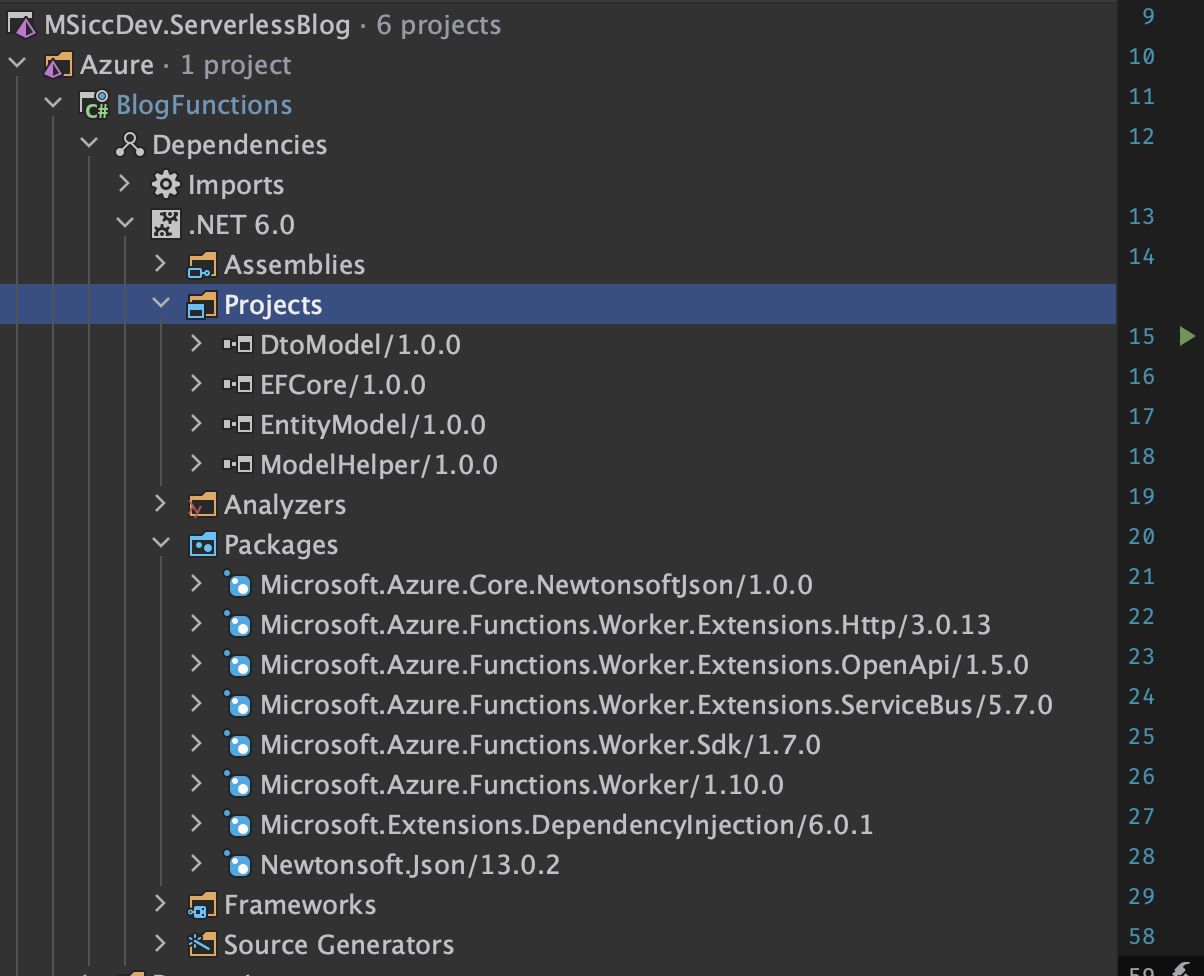
To enable all the functionalities we are going to use and add, we need some NuGet packages:
- Microsoft.Azure.Functions.Worker, Version=1.10.0
- Microsoft.Azure.Functions.Worker.Sdk, Version=1.7.0
- Microsoft.Azure.Functions.Worker.Extensions.Http, Version=3.0.13
- Microsoft.Azure.Functions.Worker.Extensions.ServiceBus, Version=5.7.0
- Microsoft.Extensions.DependencyInjection, Version=6.0.1
- Microsoft.Azure.Core.NewtonsoftJson, Version=1.0.0
Please note that I use the latest version that support .NET 6 and not the .NET 7. We also need to reference the projects we already created before, as you can see in this picture:
Program.cs
Now we finally can have a look at our Program.cs file. I am not using top-level statements here, but feel free if you want to, the code doesn’t change, just the surroundings.
To make our application running, we need to create a new HostBuilder object. I still prefer Newtonsoft.Json over System.Text.Json, so let’s add that one first:
1
2
3
 IHost? host = new HostBuilder().ConfigureFunctionsWorkerDefaults(worker => worker.UseNewtonsoftJson()).Build();

host.Run();
In order to be able to use our Entity Framework project we created already earlier, we need to add a ConnectionString and also configure the application to instantiate our DBContext. Update the code above as follows:
1
2
3
4
5
6
7
8
9
10
11
12
13
14
 string? sqlConnectionString = Environment.GetEnvironmentVariable("SqlConnectionString");

IHost? host =
	new HostBuilder().
		ConfigureFunctionsWorkerDefaults(worker => worker.UseNewtonsoftJson()).
		ConfigureServices(services =>
		{
			if (!string.IsNullOrWhiteSpace(sqlConnectionString))
				services.AddDbContext<BlogContext>(options =>
					options.UseSqlServer(sqlConnectionString));
		}).
		Build();

host.Run();
The connection string will be read from the local.settings.json file locally and from the Function app’s configuration on Azure. For the moment, just add your local ConnectionString:
1
2
3
4
5
6
7
8
9
 {
  "IsEncrypted": false,
    "Values": {
        "FUNCTIONS_WORKER_RUNTIME": "dotnet-isolated",
        "AzureWebJobsStorage": "UseDevelopmentStorage=true",
        "SqlConnectionString": "Data Source=localhost;Initial Catalog=localDB;User ID=sa;Password=thisShouldB3Stronger!",

    }
}
Side note: If you have a look into the GitHub repo, you will see that there are some entries for OpenAPI in both files. The OpenAPI integration will get its own blog post later in this blog series, but for this post, they are not important.
Conclusion
In this post, we had a look at how to set up an Azure Functions app with Newtonsoft.Json and our Entity.Framework DbContext. In the next post, we will have a look at some Extensions that will be helpful, as well as the base class implementation of most functions within the app. As always, I hope this post was helpful for some of you.