How to avoid a distorted Android camera preview with ZXing.Net.Mobile [Updated]
Update: The application I used to determine this blog post is portrait only, that’s why I totally missed the landscape part. I have to thank Timo Partl, who pointed me to that fact on Twitter. I updated the solution/workaround part to reflect the orientation as well.
If you need to implement QR-scanning into your Xamarin (Forms) app, chances are high you will be using the ZXing.Net.Mobile library (as it is the most complete solution out there). In one of my recent projects, I wanted to exactly that. I have used the library already before and thought it might be an easy play.
Distorted reality…
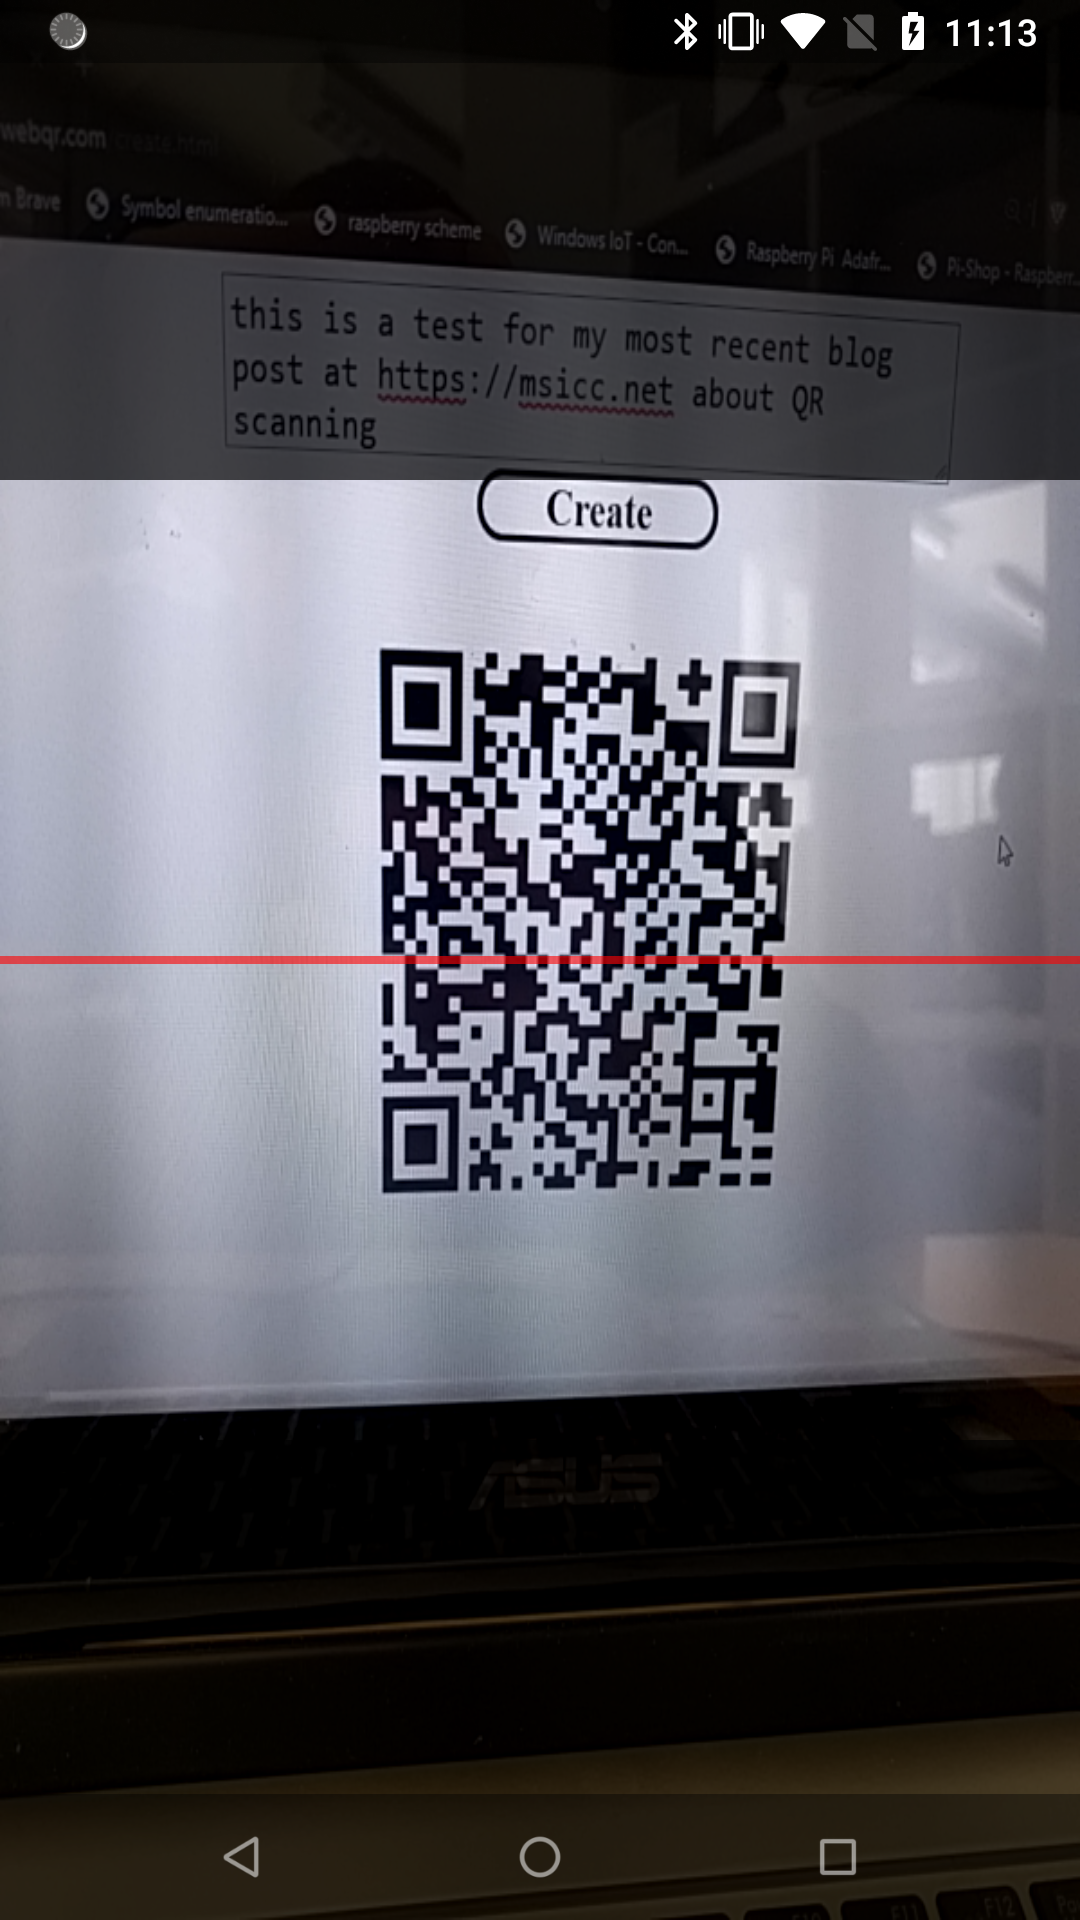
Reality hit me hard when I realized that the preview is totally distorted:
 Even with that distortion, the library detects the QR code without problems. However, the distortion is not something you want your user to experience. So I started to investigate why this distortion happens. As I am not the only one experiencing this problem, I am showing to easily fix that issue and the way that led to the solution (knowing also some beginners follow my blog).
Searching the web …
.. often brings you closer to the solution. Most of the time, you are not the only one that runs into such a problem. Doing so let me find the Github issue above, showing my theory is correct. Sometimes, those Github issues provide a solution – this time, not. After not being able to find anything helpful, I decided to fork the Github repo and downloaded it into Visual Studio.
Debugging
Once the solution was loaded in Visual Studio, I found that there are some samples in the repo that made debugging easy for me. I found the case that matches my implementation best (using the ZXingScannerView). After hitting the F10 (to move step by step through the code) and F11 (to jump into methods) quite often, I understood how the code works under the hood.
The cause
If you are not telling the library the resolution you want to have, it will select one for you based on this rudimentary rule (view source on Github):
1
2
3
4
5
6
7
8
9
10
11
12
13
14
15
16
 // If the user did not specify a resolution, let's try and find a suitable one
if (resolution == null)
{
    foreach (var sps in supportedPreviewSizes)
    {
        if (sps.Width >= 640 && sps.Width <= 1000 && sps.Height >= 360 && sps.Height <= 1000)
        {
            resolution = new CameraResolution
            {
                Width = sps.Width,
                Height = sps.Height
            };
            break;
        }
    }
}
Let’s break it down. This code takes the available resolutions from the (old and deprecated) Android.Hardware.Camera API and selects one that matches the ranges defined in the code without respect to the aspect ratio of the device display. On my Nexus 5X, it always selects the resolution of 400×800. This does not match my device’s aspect ratio, but the Android OS does some stretching and squeezing to make it visible within the SurfaceView used for the preview. The result is the distortion seen above.
Note: The code above is doing exactly what it is supposed to do. However, it was updated last 3 years ago (according to Github). Display resolutions and aspect ratios changed a lot during that time, so we had to arrive at this point sooner or later.
Solution/Workaround
The solution to this is pretty easy. Just provide a <a aria-label="CameraResolutionSelectorDelegate (opens in a new tab)" href="https:// public delegate CameraResolution CameraResolutionSelectorDelegate (List<CameraResolution> availableResolutions);" rel="noreferrer noopener" target="_blank">CameraResolutionSelectorDelegate</a> with your code setting up the ZXingScannerView. First, we need a method that returns a <a aria-label="CameraResolution (opens in a new tab)" href="https://github.com/Redth/ZXing.Net.Mobile/blob/master/Source/ZXing.Net.Mobile.Core/CameraResolution.cs" rel="noreferrer noopener" target="_blank">CameraResolution</a> and takes a List of CameraResolution, let’s have a look at that one first:
1
2
3
4
5
6
7
8
9
10
11
12
13
14
15
16
17
18
19
20
21
22
23
24
25
26
27
 public CameraResolution SelectLowestResolutionMatchingDisplayAspectRatio(List<CameraResolution> availableResolutions)
{
    CameraResolution result = null;

    //a tolerance of 0.1 should not be visible to the user
    double aspectTolerance = 0.1;
    var displayOrientationHeight = DeviceDisplay.MainDisplayInfo.Orientation == DisplayOrientation.Portrait ? DeviceDisplay.MainDisplayInfo.Height : DeviceDisplay.MainDisplayInfo.Width;
    var displayOrientationWidth = DeviceDisplay.MainDisplayInfo.Orientation == DisplayOrientation.Portrait ? DeviceDisplay.MainDisplayInfo.Width : DeviceDisplay.MainDisplayInfo.Height;

    //calculatiing our targetRatio
    var targetRatio = displayOrientationHeight / displayOrientationWidth;
    var targetHeight = displayOrientationHeight;
    var minDiff = double.MaxValue;

    //camera API lists all available resolutions from highest to lowest, perfect for us
    //making use of this sorting, following code runs some comparisons to select the lowest resolution that matches the screen aspect ratio and lies within tolerance
    //selecting the lowest makes Qr detection actual faster most of the time
    foreach (var r in availableResolutions.Where(r => Math.Abs(((double)r.Width / r.Height) - targetRatio) < aspectTolerance))
    {
            //slowly going down the list to the lowest matching solution with the correct aspect ratio
            if (Math.Abs(r.Height - targetHeight) < minDiff)
            minDiff = Math.Abs(r.Height - targetHeight);
            result = r;
    }

    return result;
}
First, we are setting up a fixed tolerance for the aspect ratio. A value of 0.1 should not be recognizable for users. The next step is calculating the target ratio. I am using the Xamarin.Essentials API here, because it saves me some code and works both in Xamarin.Android only projects as well as Xamarin.Forms ones.
Before we are able to select the best matching resolution, we need to notice a few points:
- lower resolutions result in faster QR detection (even with big ones)
- preview resolutions are always presented landscape
- the list of available resolutions is sorted from biggest to smallest
Considering these points, we are able to loop over the list of available resolutions. If the current ratio is out of our tolerance range, we ignore it and move on. By setting the minDiff double down with every iteration, we are moving down the list to arrive at the lowest possible resolution that matches our display’s aspect ratio best. In the case of my Nexus 5X 480×800 with an aspect ratio of 1.66666~, which matches the display aspect ratio of 1,66111~ pretty close.
Delegating the selection call
Now that we have our calculating method in place, we need to pass the method via the CameraResolutionSelectorDelegate to our MobileBarcodeScanningOptions.
If you are on Xamarin.Android, your code will look similar to this:
1
2
3
4
5
 var options = new ZXing.Mobile.MobileBarcodeScanningOptions()
{
   PossibleFormats = new List<ZXing.BarcodeFormat>() { ZXing.BarcodeFormat.QR_CODE },
CameraResolutionSelector = new CameraResolutionSelectorDelegate(SelectLowestResolutionMatchingDisplayAspectRatio)
}
If you are on Xamarin.Forms, you will have to use the DependencyService to get to the same result (as the method above has to be written within the Android project):
1
2
3
4
5
 var options = new ZXing.Mobile.MobileBarcodeScanningOptions()
{
   PossibleFormats = new List<ZXing.BarcodeFormat>() { ZXing.BarcodeFormat.QR_CODE },
CameraResolutionSelector = DependencyService.Get<IZXingHelper>().CameraResolutionSelectorDelegateImplementation
}
The result
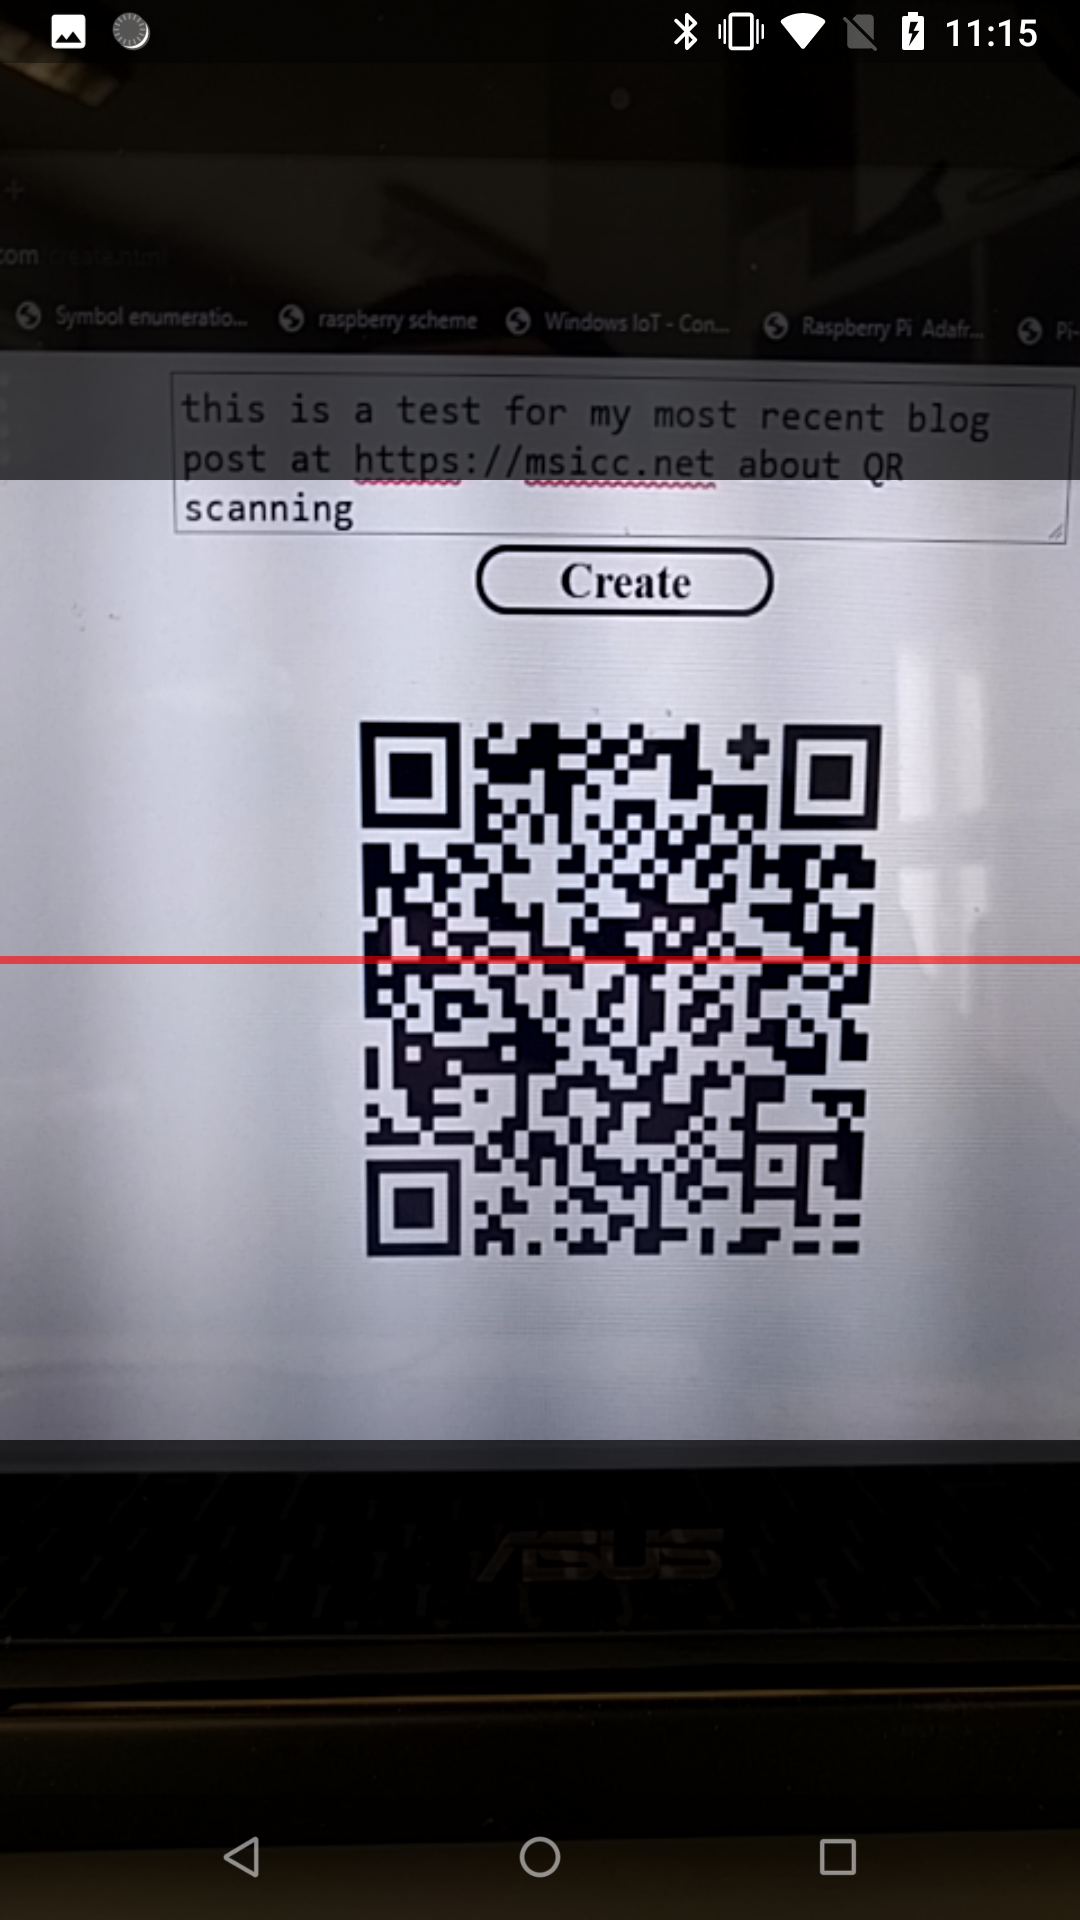
Now that we have an updated resolution selection mechanism in place, the result is exactly what we expected, without any distortion:
Remarks
In case none of the camera resolutions gets selected, the camera preview automatically uses the default resolution. In my tests with three devices, this is always the highest one. The default resolution normally matches the devices aspect ratio. As it is the highest, it will slow down the QR detection, however.
The ZXing.Net.Mobile library uses the deprecated Android.Hardware.Camera API and Android.FastCamera library on Android. The next step would be to migrate over to the Android.Hardware.Camera2 API, which makes the FastCamera library obsolete and is future proof. I had already a look into that step, as I need to advance in two projects (one personal and one at work) with QR scanning, however, I postponed this change.
Conclusion
For the time being, we are still able to use the deprecated mechanism of getting our camera preview right. After identifying the reason for the distortion, I got pretty fast to a workaround/solution that should fit most use cases. As devices and their specs are evolving, we are at least not left behind. I will do another writeup once I found the time to replace the deprecated API in my fork.
As always, I hope this post will be helpful for some of you.

